In this article, I will show you how to create a Fedora 40 virtual machine on Proxmox VE.
This article is the foundation of the Proxmox VE Fedora 40 virtual machine GPU passthrough guide. Once you have a Fedora 40 virtual machine set up, you can passthrough a GPU (i.e. NVIDIA GPU) to the Fedora 40 Proxmox VE virtual machine and do amazing things on the virtual machine.
To install Fedora 40 on a Proxmox VE virtual machine, you will need the ISO installation image of Fedora 40.
You can download the ISO image of Fedora Workstation (the default Fedora spin with GNOME desktop environment) from this link.
Fedora 40 has other spins featuring other popular desktop environments. You can also download your favorite Fedora 40 spin and install it on the Proxmox VE virtual machine.
You can find a list of all the Fedora spins and the ISO installation image download links in this link.
Once you’ve downloaded an ISO installation image of your favorite Fedora spin, you must upload the Fedora ISO installation image on your Proxmox VE server.
To create a new Fedora virtual machine on Proxmox VE, click on Create VM from the top-right corner of the Proxmox VE web management interface.

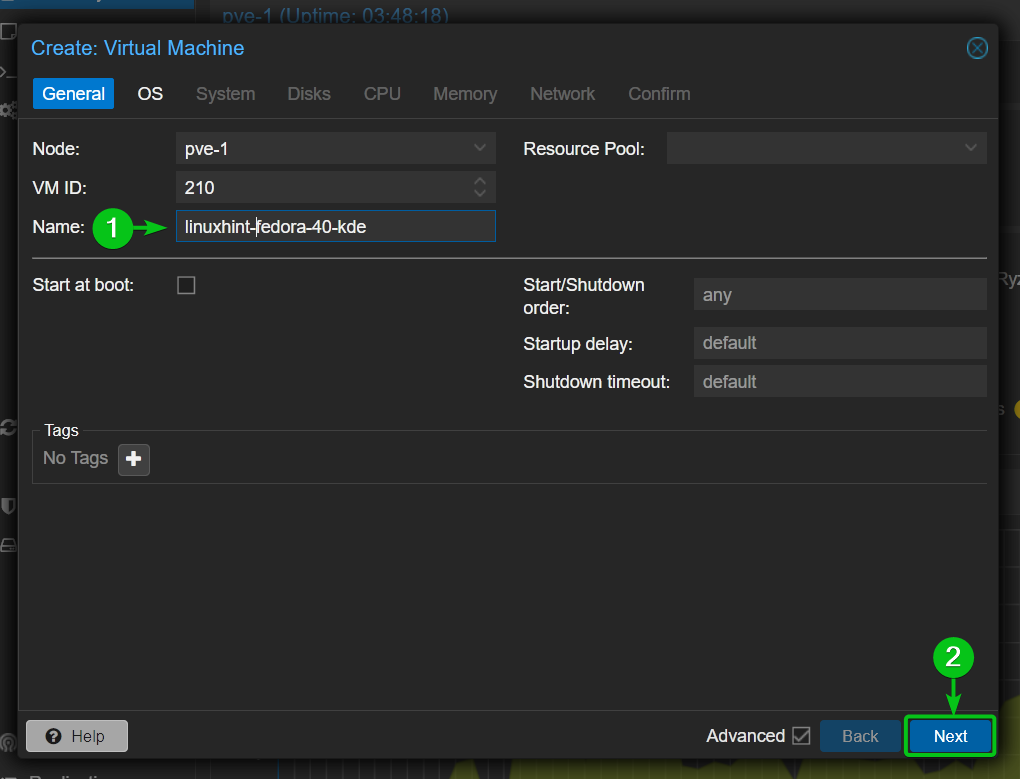
Type in a name for the virtual machine[1] and click on Next[2].
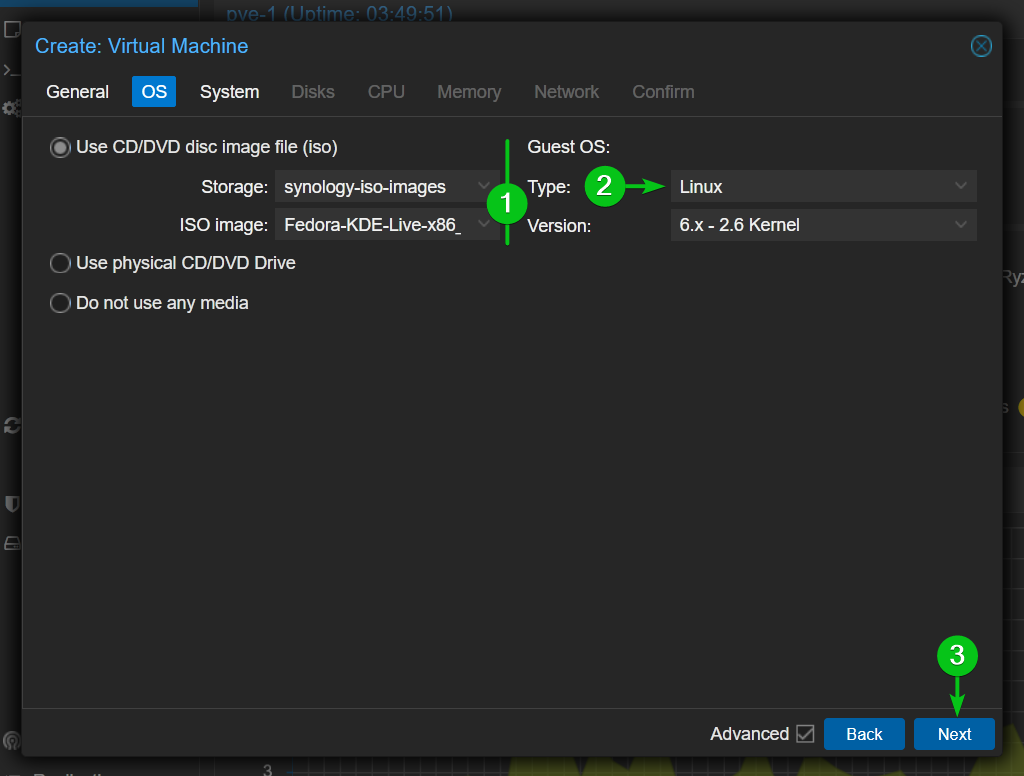
Select the Fedora 40 ISO installation image[1], select Linux as the Guest OS type[2], and click on Next[3].
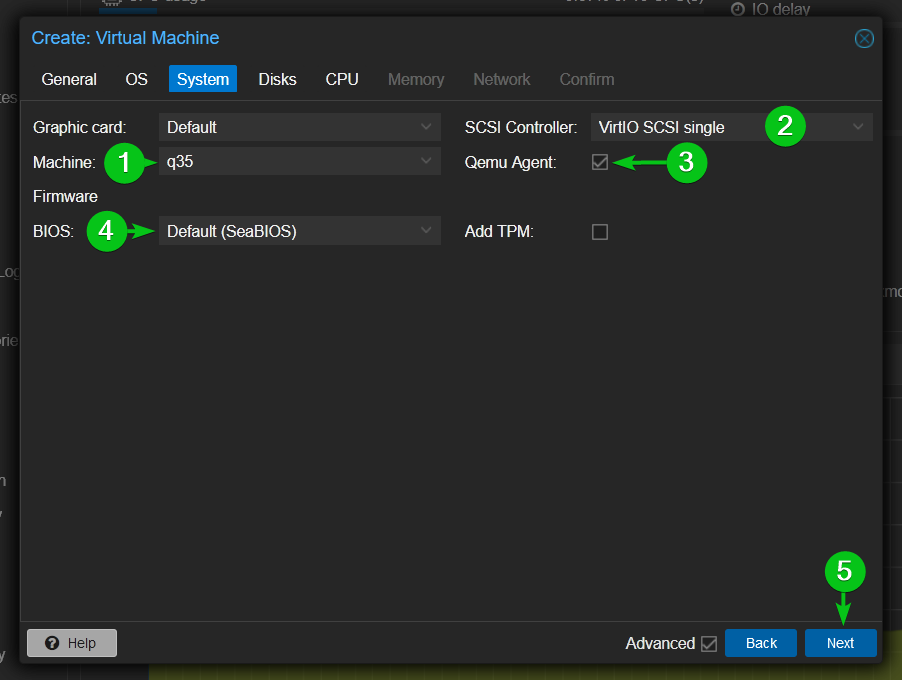
Select q35 from the Machine dropdown menu[1], select VirtIO SCSI single from the SCSI Controller dropdown menu[2], tick Qemu Agent[3], select Default (SeaBIOS) or SeaBIOS from the BIOS dropdown menu if you want to use the traditional BIOS firmware instead of the UEFI firmware[4], and click on Next[5].
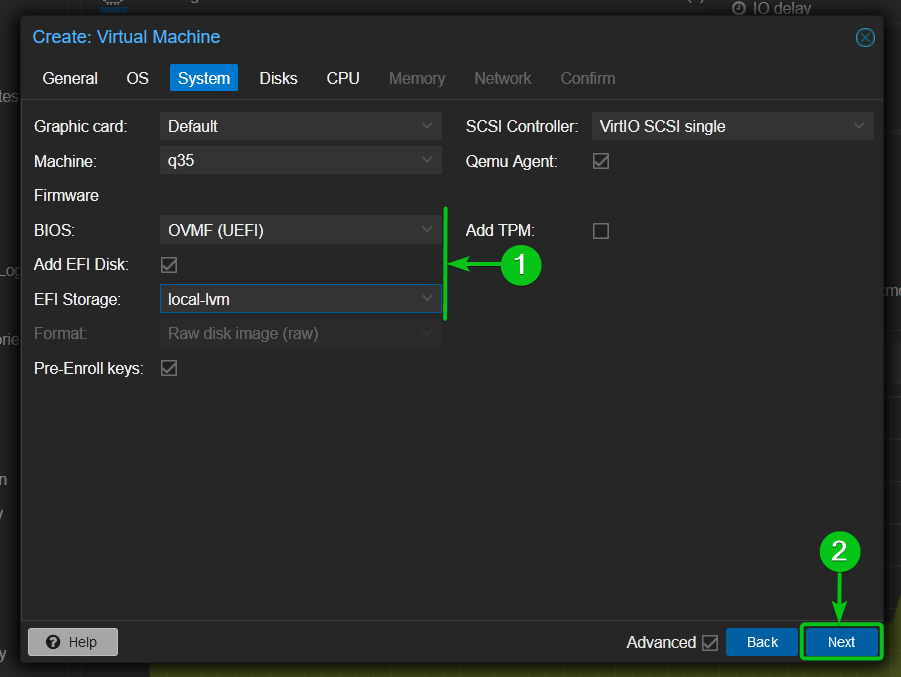
If you want to use the UEFI BIOS firmware, select OVMF (UEFI) from the BIOS dropdown menu. Then, tick Add EFI Disk and select a storage (where you want to store the EFI disk) from the EFI storage dropdown menu[1].
Once you’re done, click on Next[2].
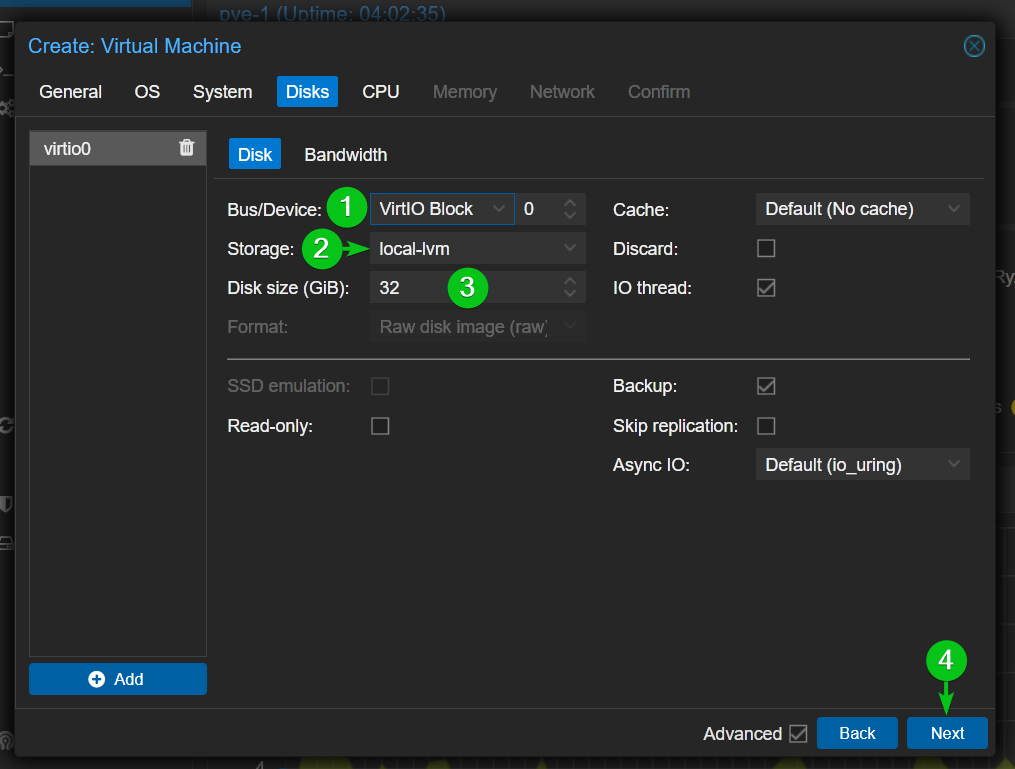
Now, you have to configure a disk for the virtual machine.
Select VirtIO Block from the Bus/Device dropdown menu[1], select a storage from the Storage dropdown menu[2], and type in the amount of disk space that you want to allocate for the virtual machine in the Disk size (GiB) section.
Once you’re done, click on Next[4].
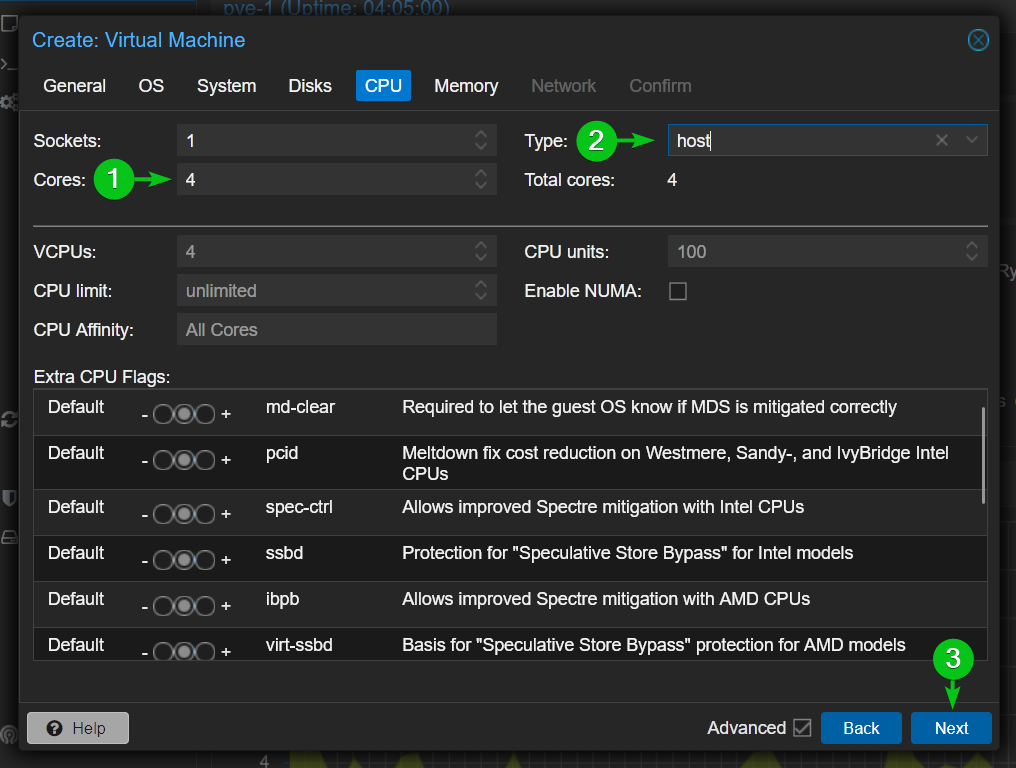
Select the number of CPU Cores you want to allocate for this virtual machines[1] and select host from the CPU Type dropdown menu[2].
Once you’re done, click on Next[3].
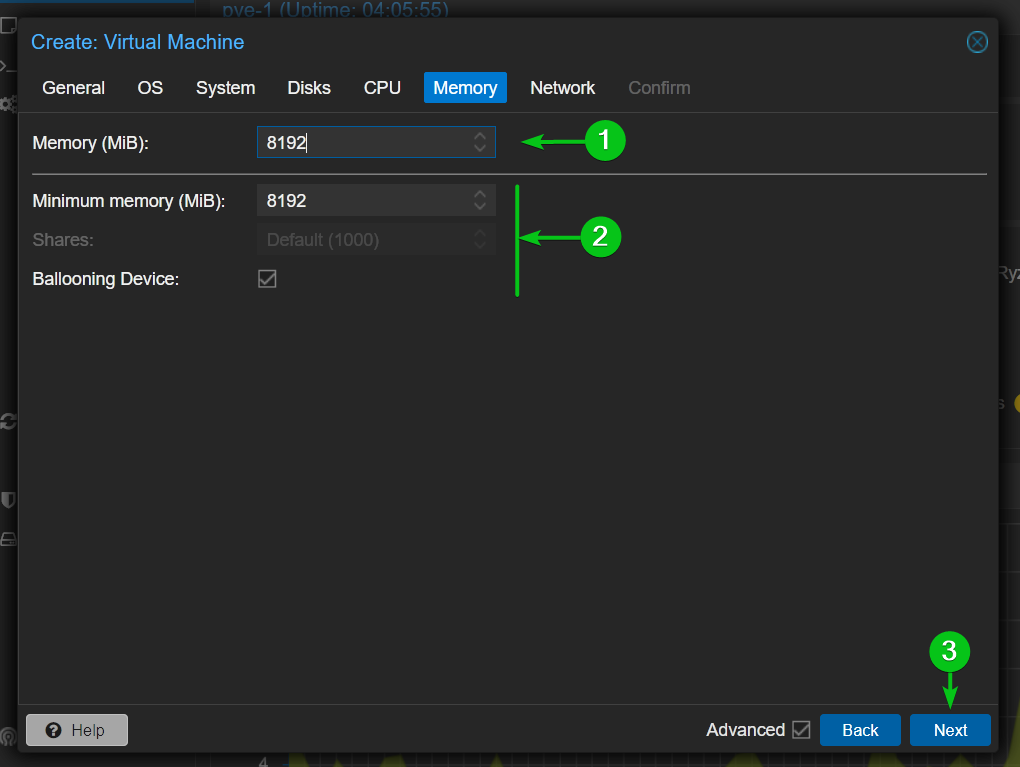
Type in the amount of memory (RAM) you want to allocate for the virtual machine in the Memory (MiB) section.
If you want to allocate memory to the virtual machine efficiently and free up unused memory so that Proxmox VE can reuse them for other virtual machines, tick Ballooning Device to enable memory ballooning and type in the Minimum memory (MiB) that you want to allocate to the virtual machine[2]. Proxmox VE will try to use the minimum amount of memory unless the virtual machine needs more memory.
If you want to passthrough a GPU or other PCI/PCIE devices to the virtual machine, you should untick Ballooning device to disable memory ballooning. Hardware passthrough will not work well if memory ballooning is enabled.
Once you’re done, click on Next[3].
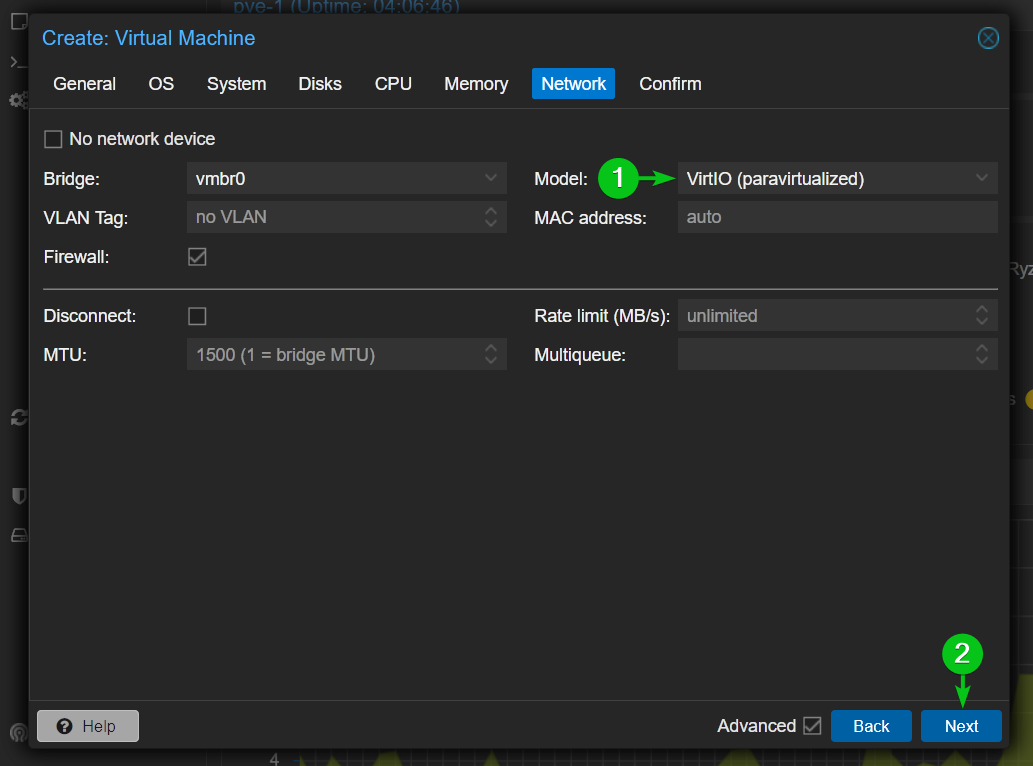
Select VirtIO (paravirtualized) as the network hardware from the Model dropdown menu[1] and click on Next[2].
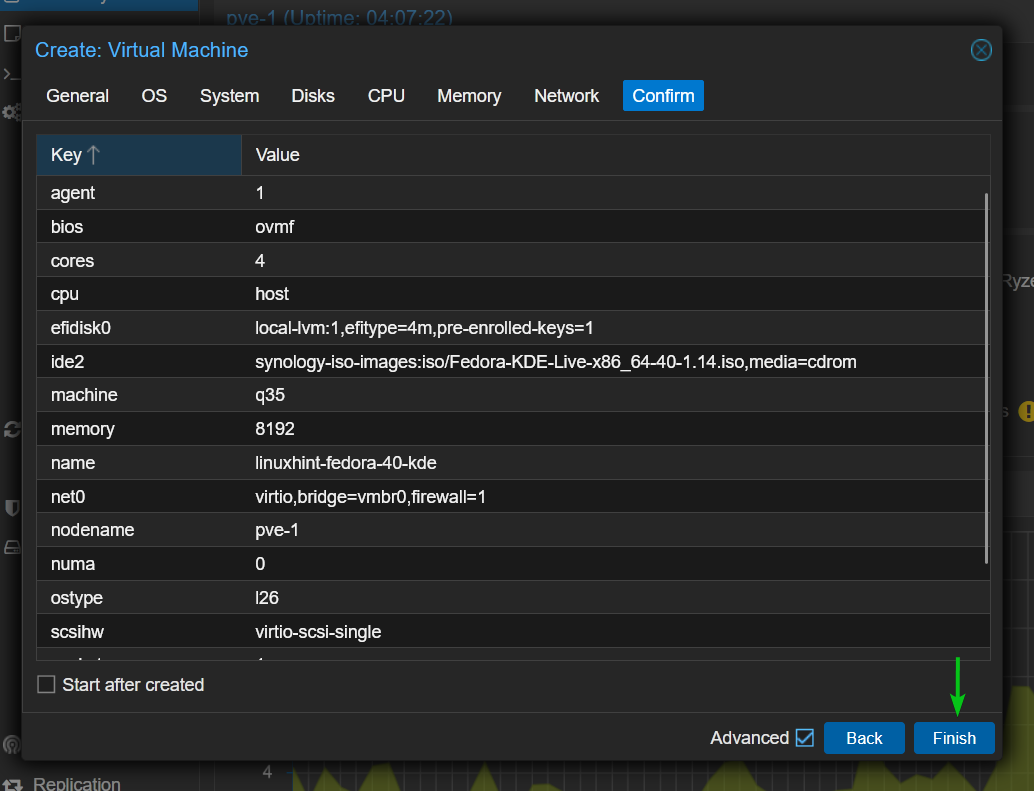
A summary of the Fedora 40 virtual machine configuration should be displayed.
To create the Fedora 40 virtual machine with those configurations, click on Finish.
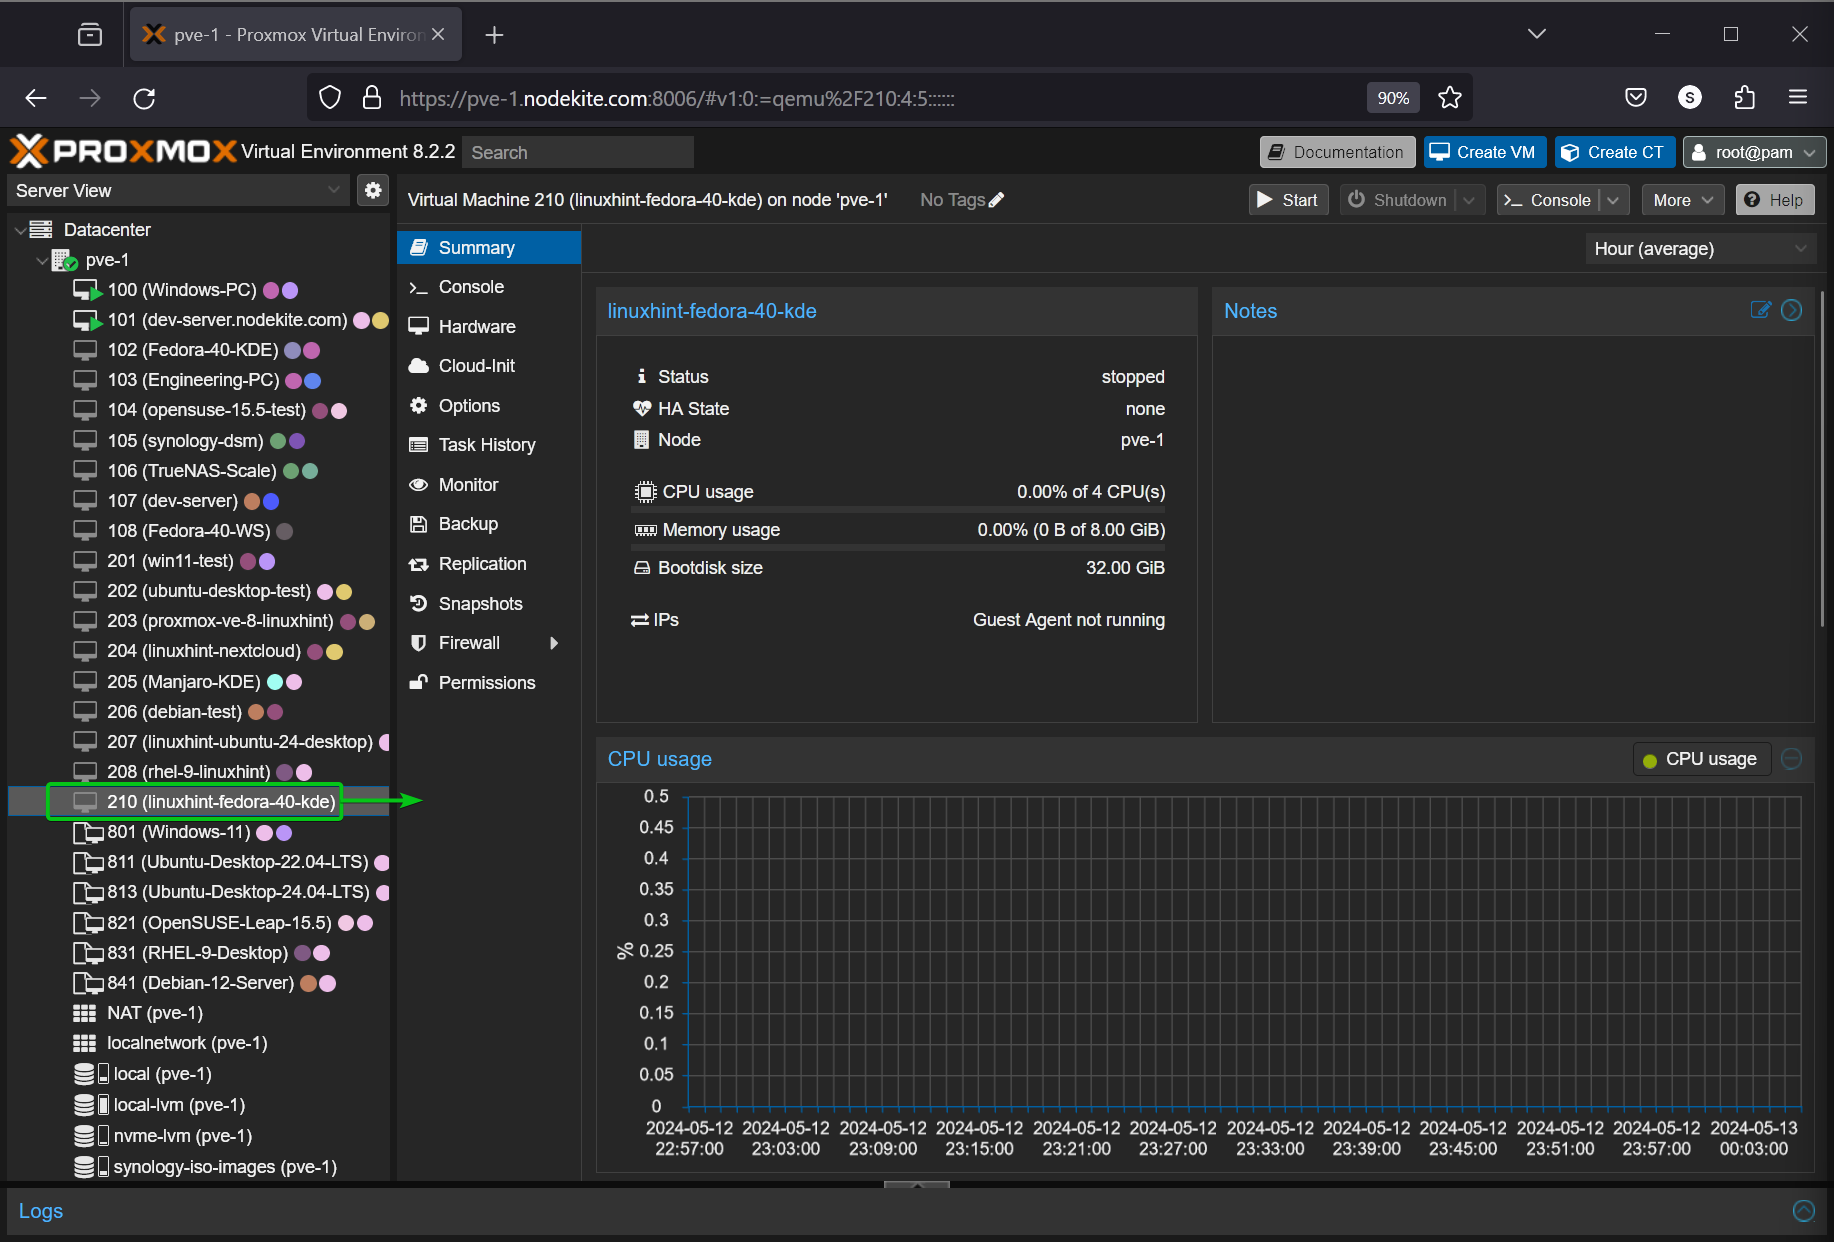
A Fedora 40 Proxmox VE virtual machine should be created.
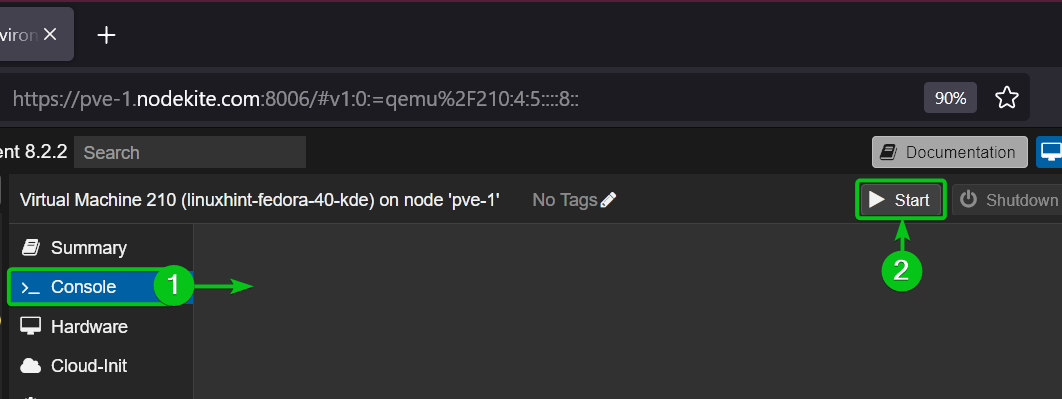
To install Fedora 40 on the Proxmox VE virtual machine, navigate to the Console section of the virtual machine[1] and click on Start[2].
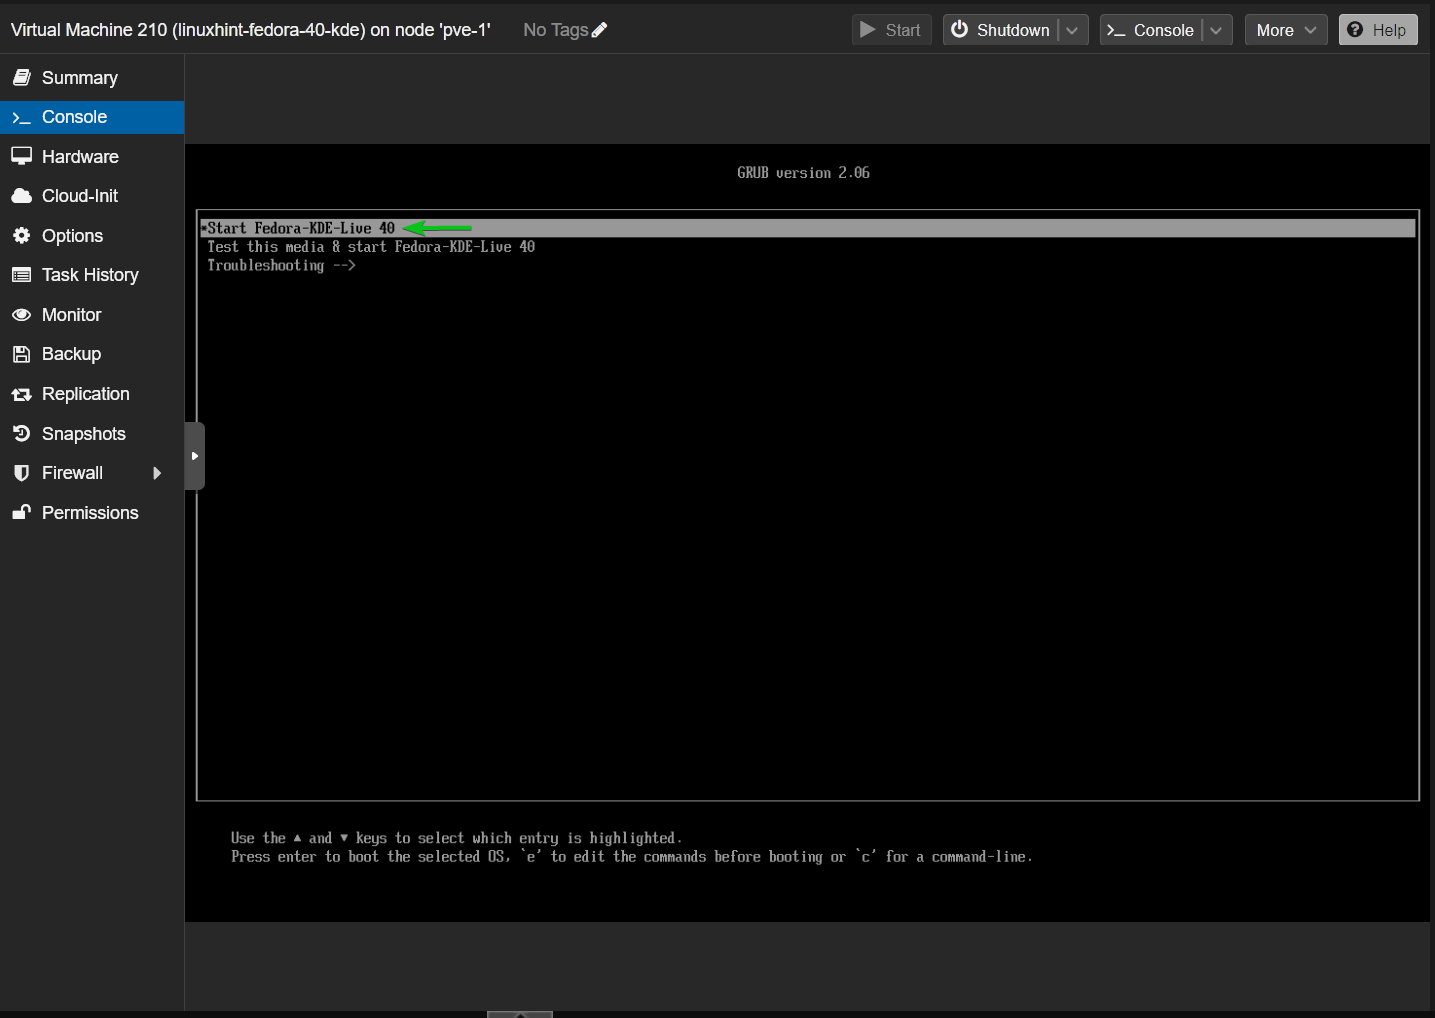
The virtual machine should boot from the Fedora 40 ISO installation image.
Select Start Fedora Live 40 and press <Enter>.
Fedora 40 should boot in live mode.
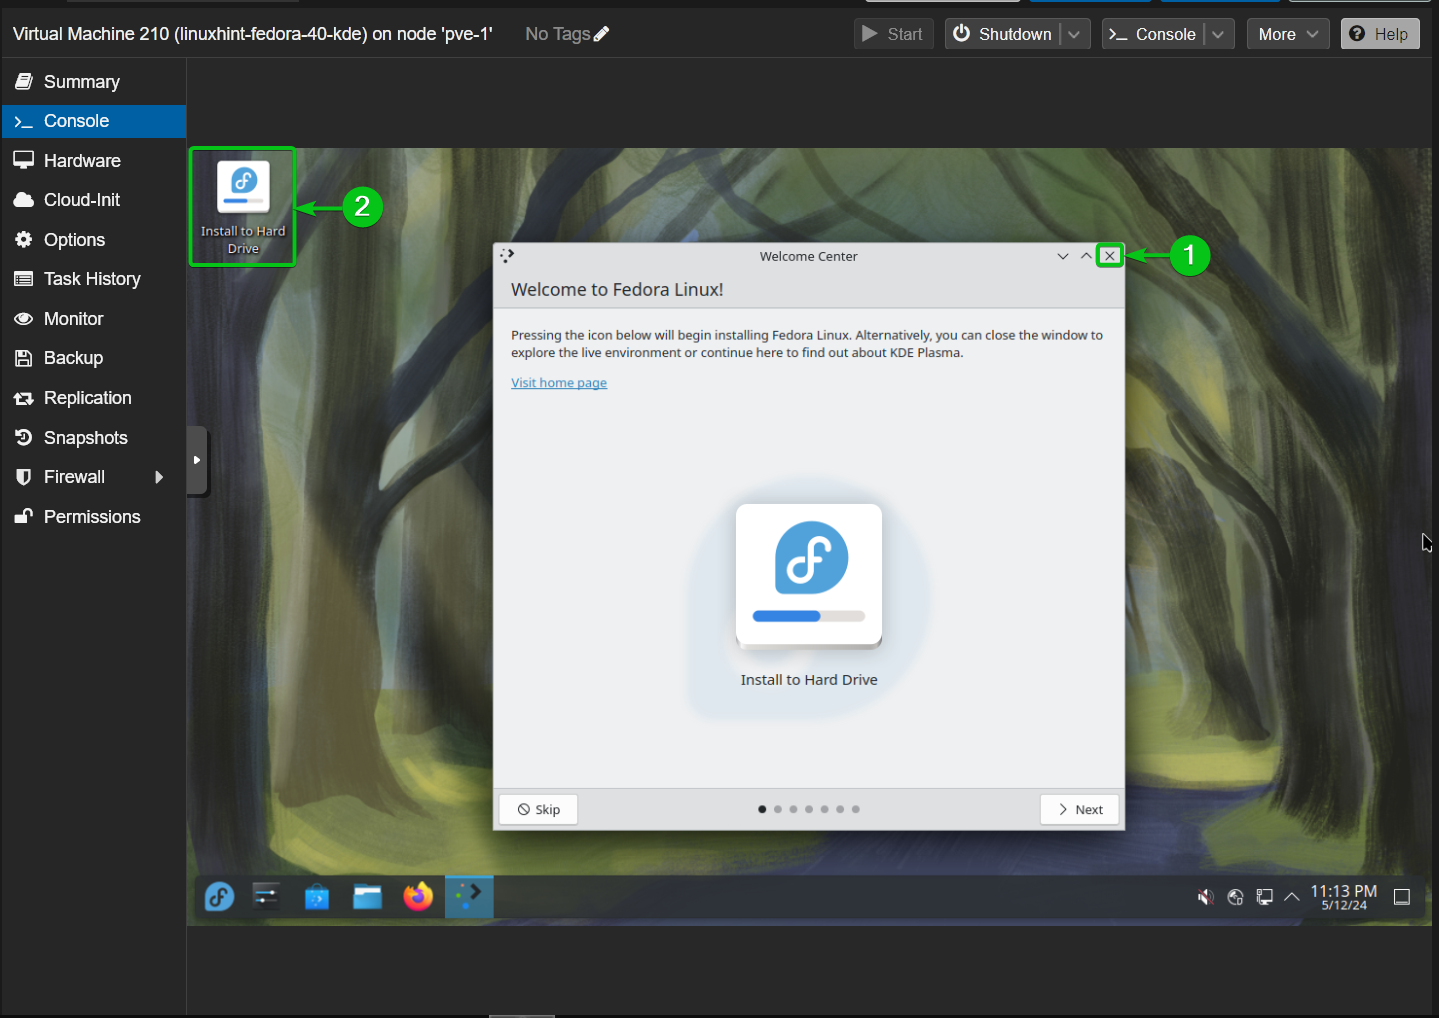
Close the welcome window[1] and double-click (LMB) on the Install to Hard Drive icon to install Fedora 40 on the disk.
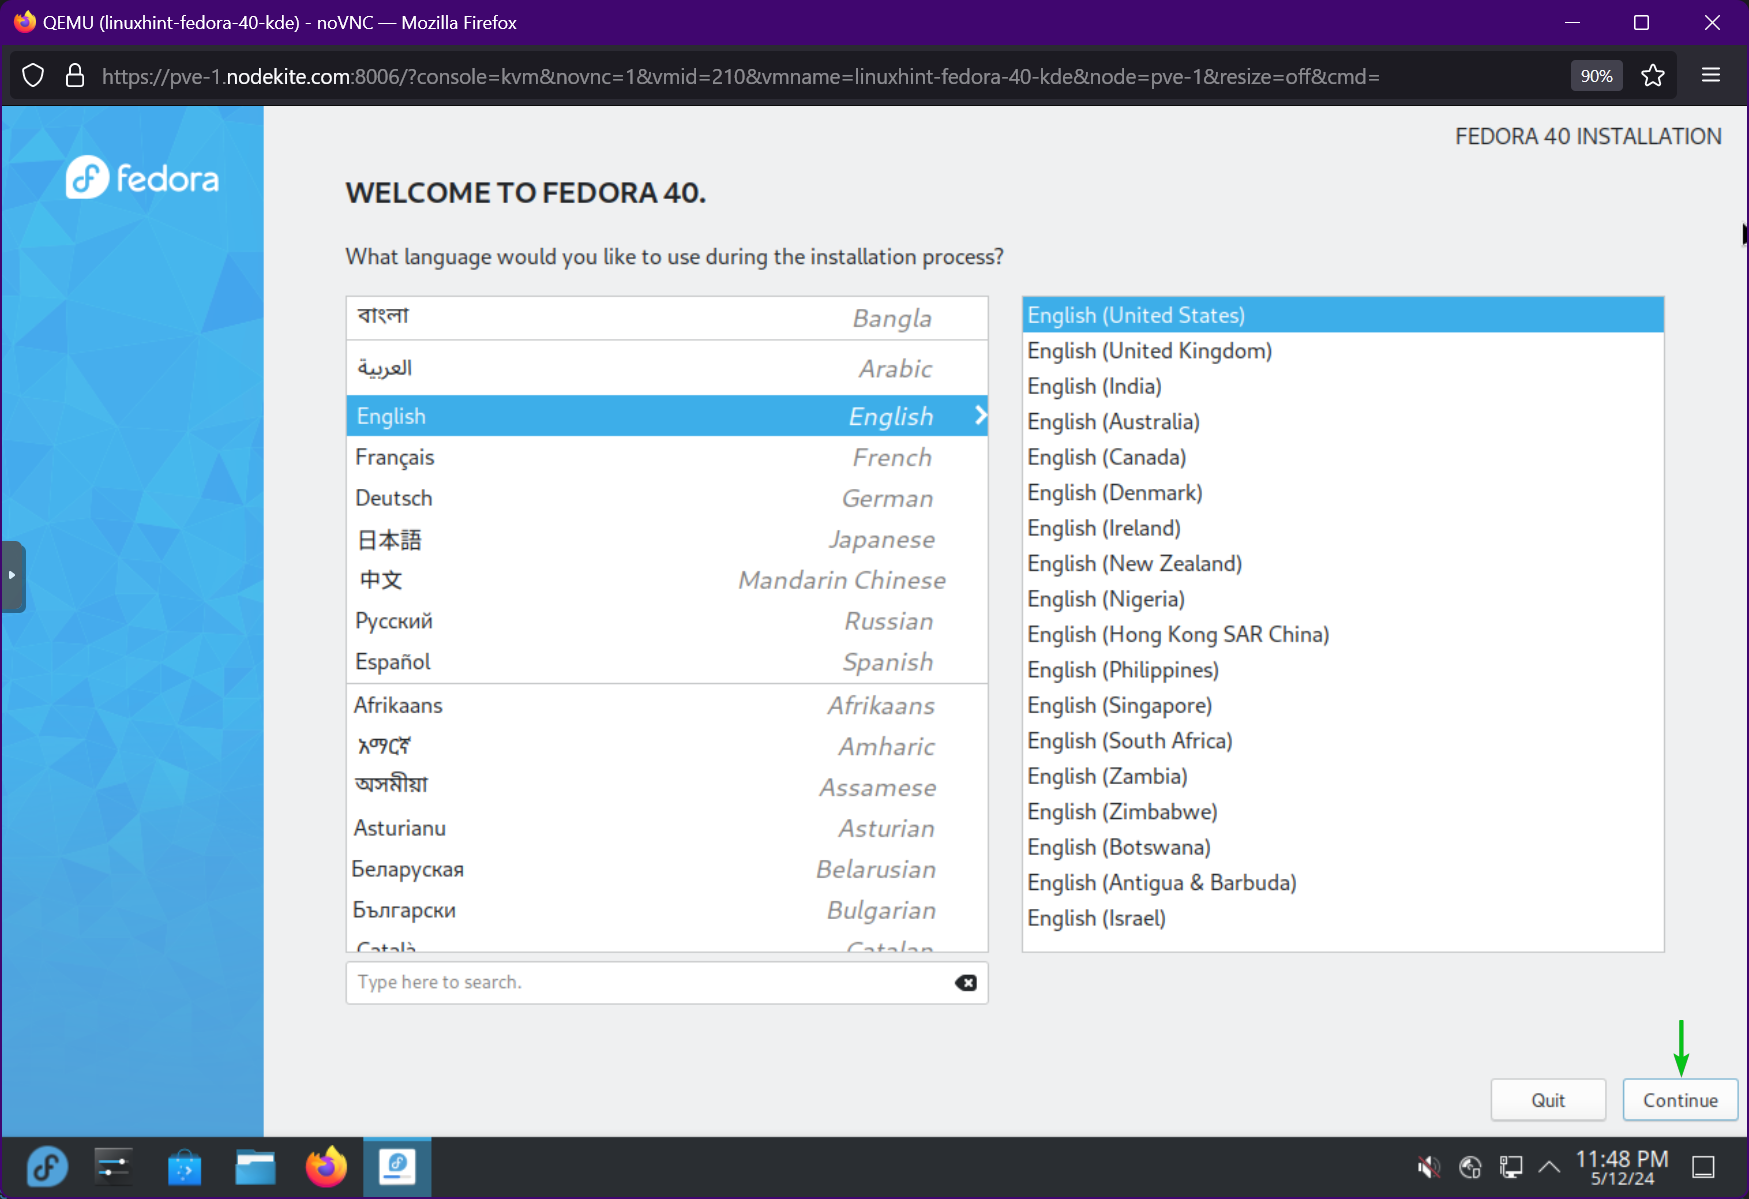
Select your language and click on Continue.
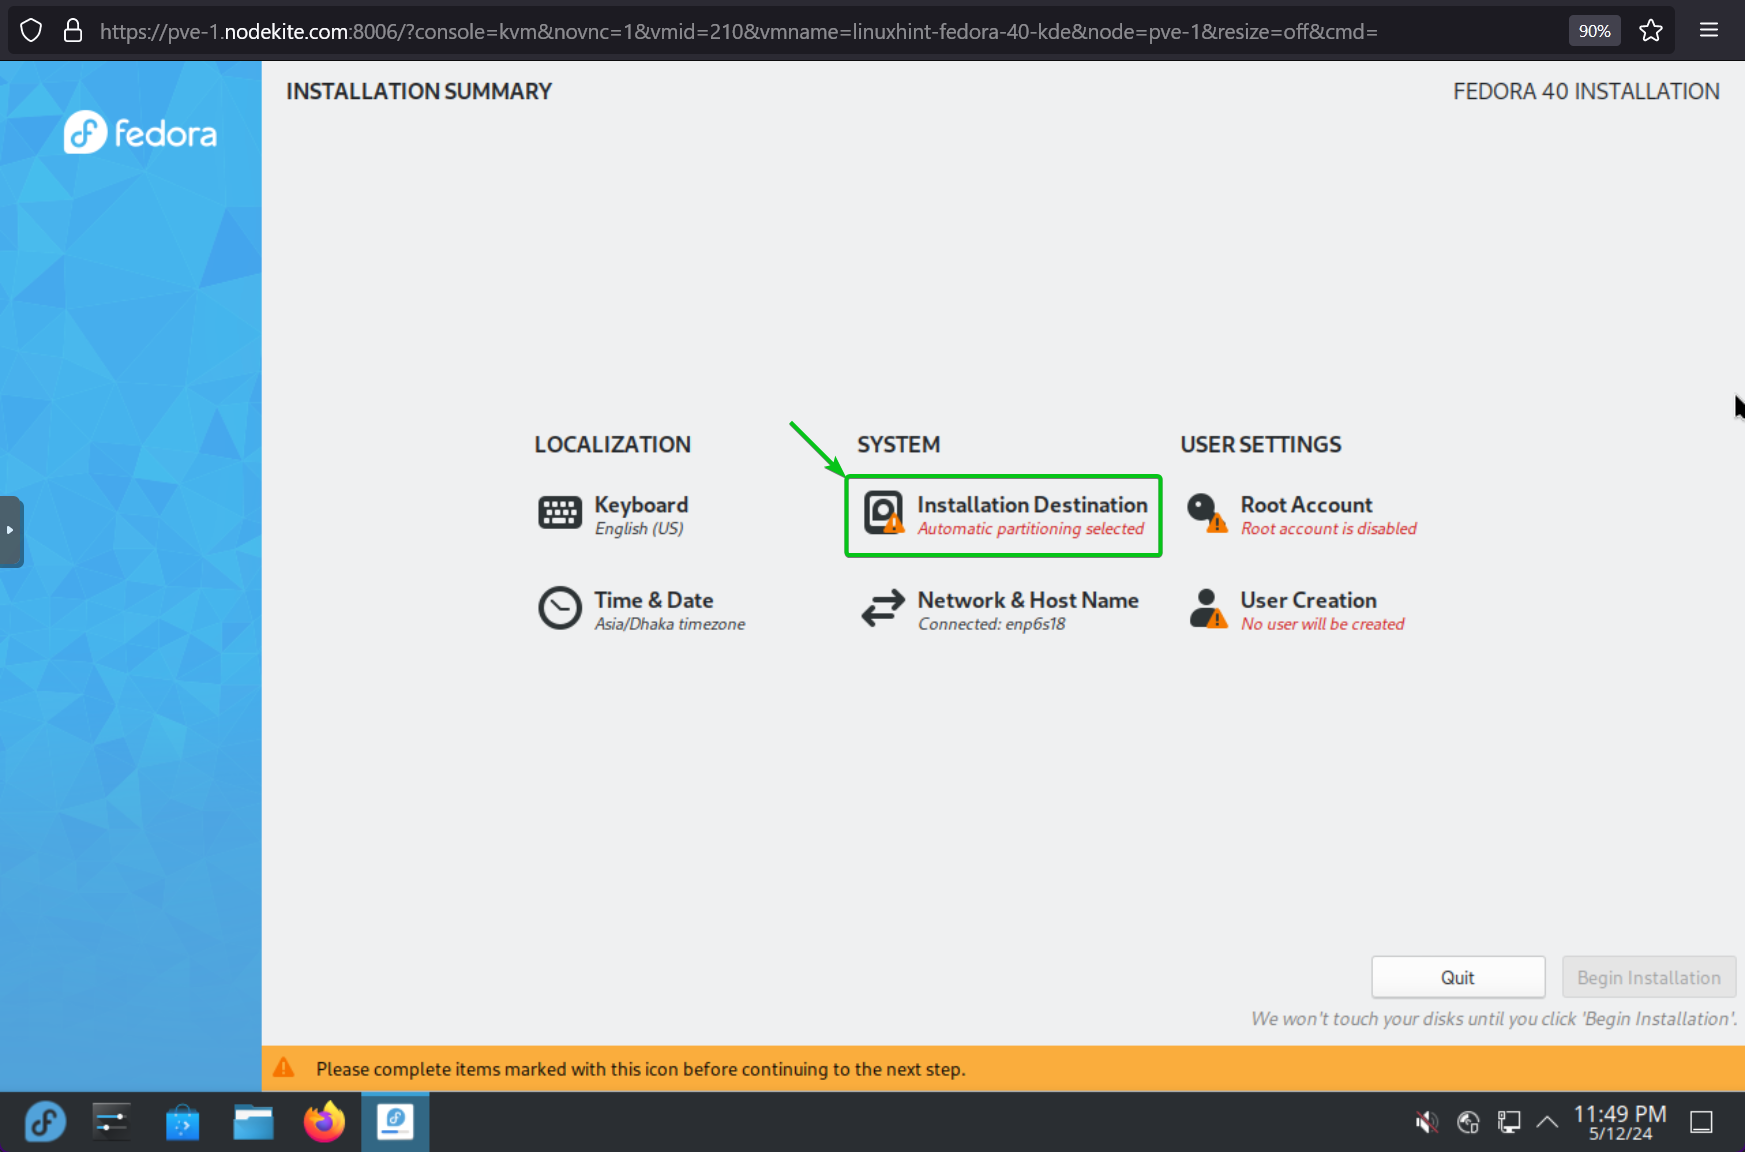
From this window, you have to configure your Fedora installation.
Click on Installation Destination to select the disk where you want to install Fedora 40.
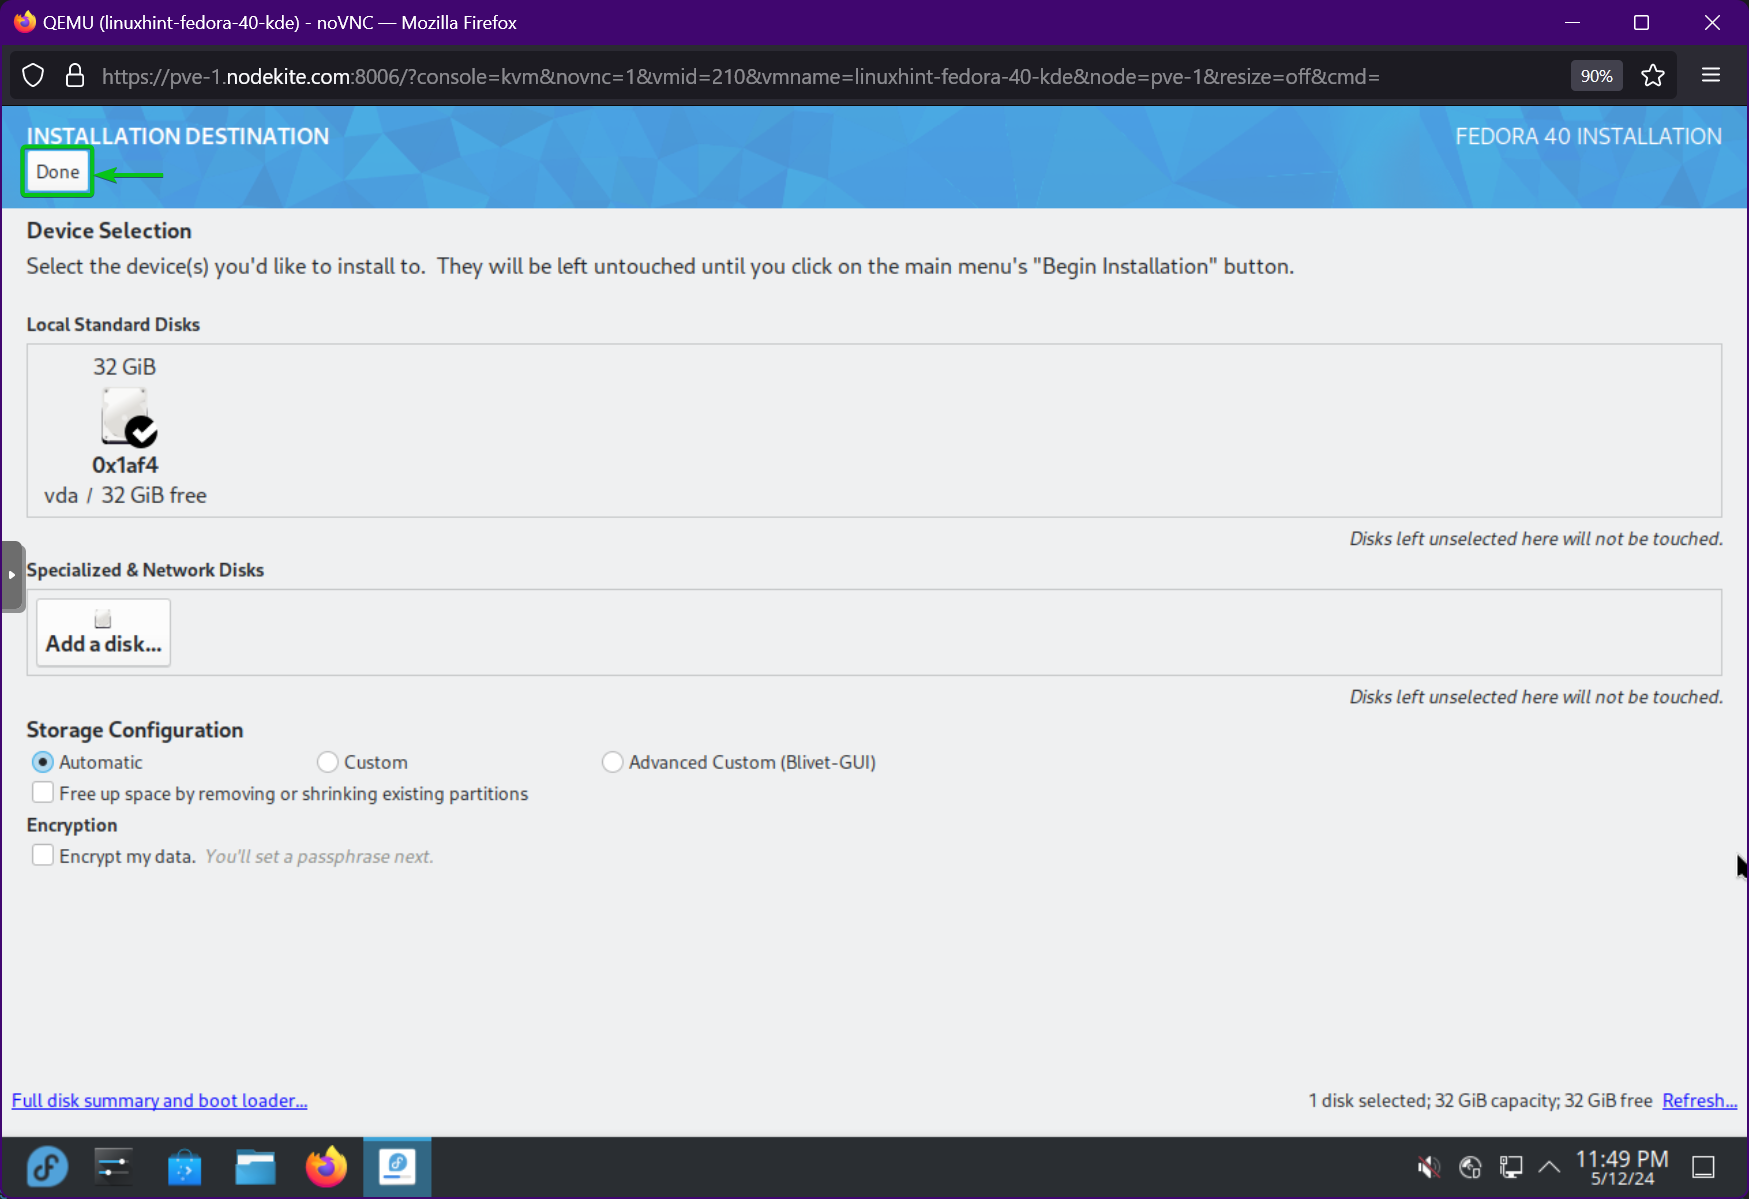
Select the disk of the virtual machine and click on Done.
Fedora installer will automatically partition the disk for you. As it’s a virtual machine, I won’t go through advanced partitioning.
To create a new login user, click on User Creation.
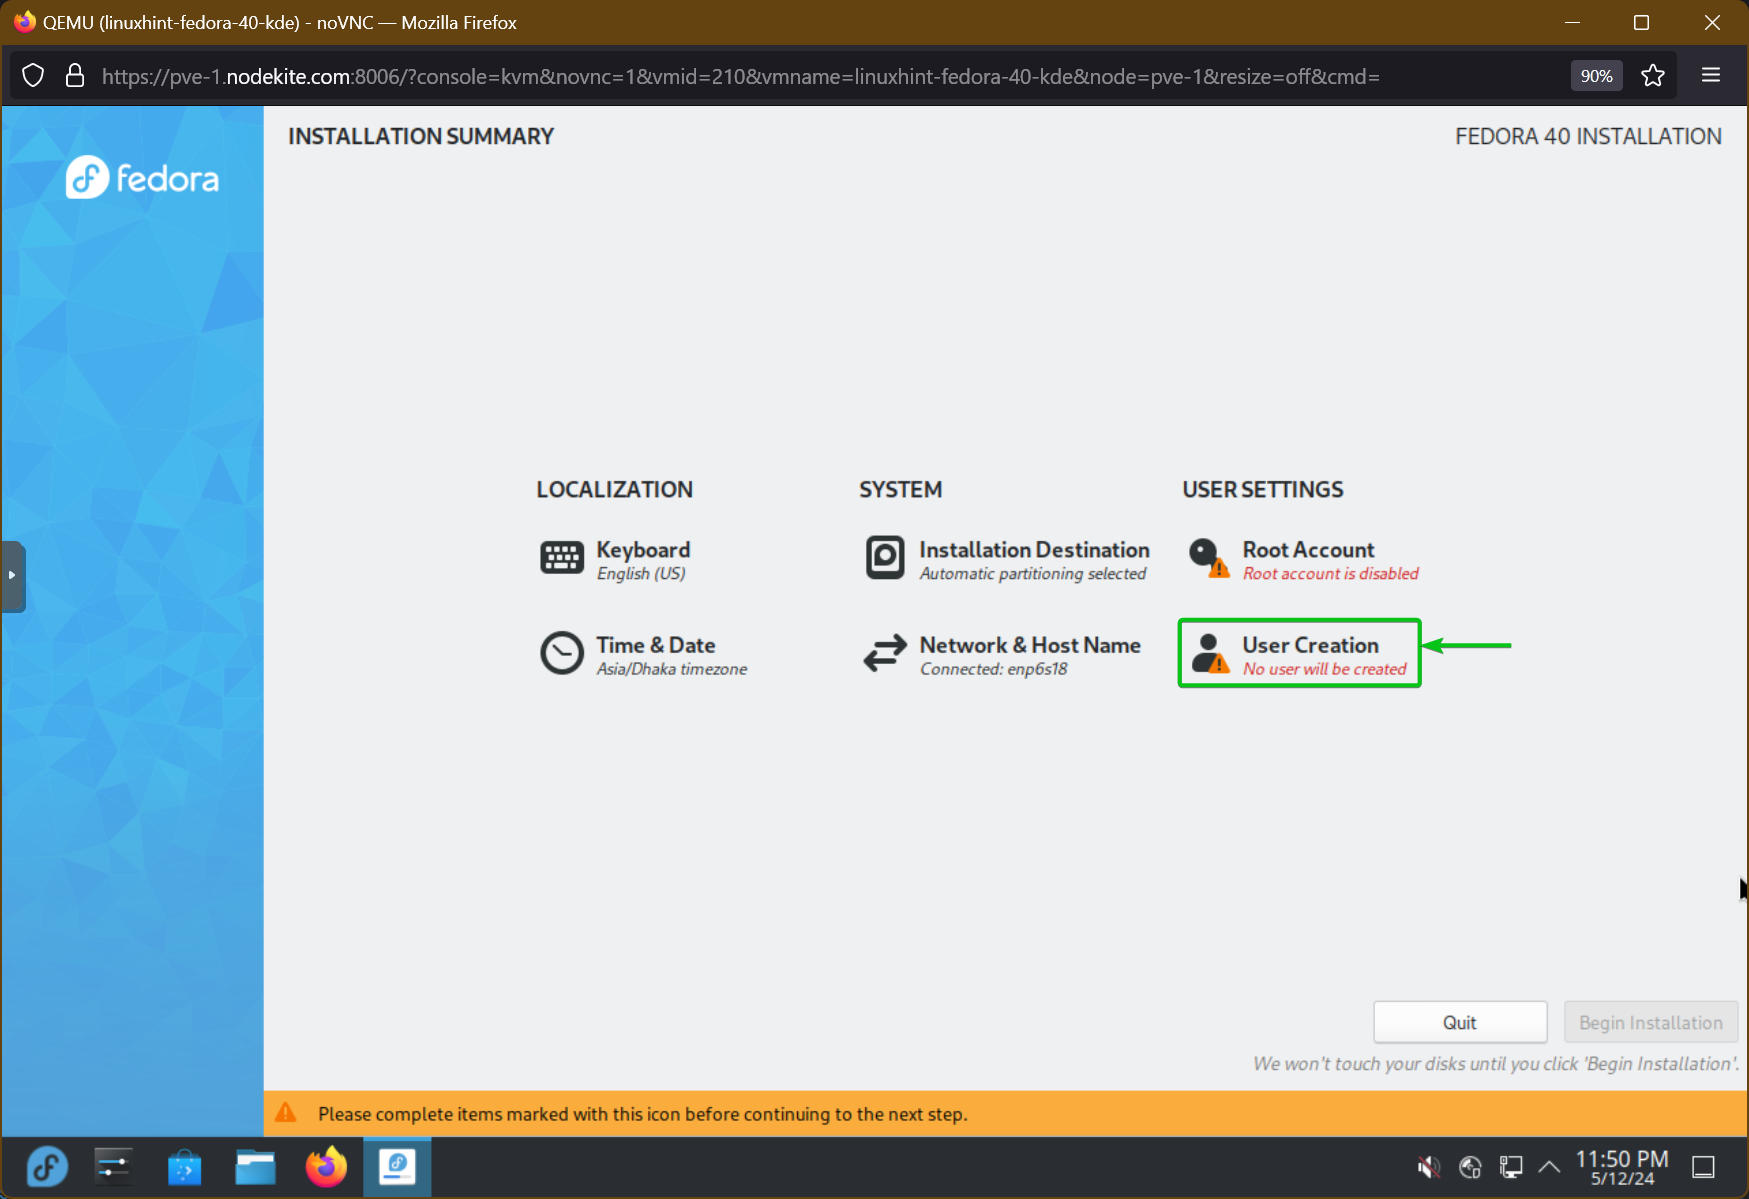
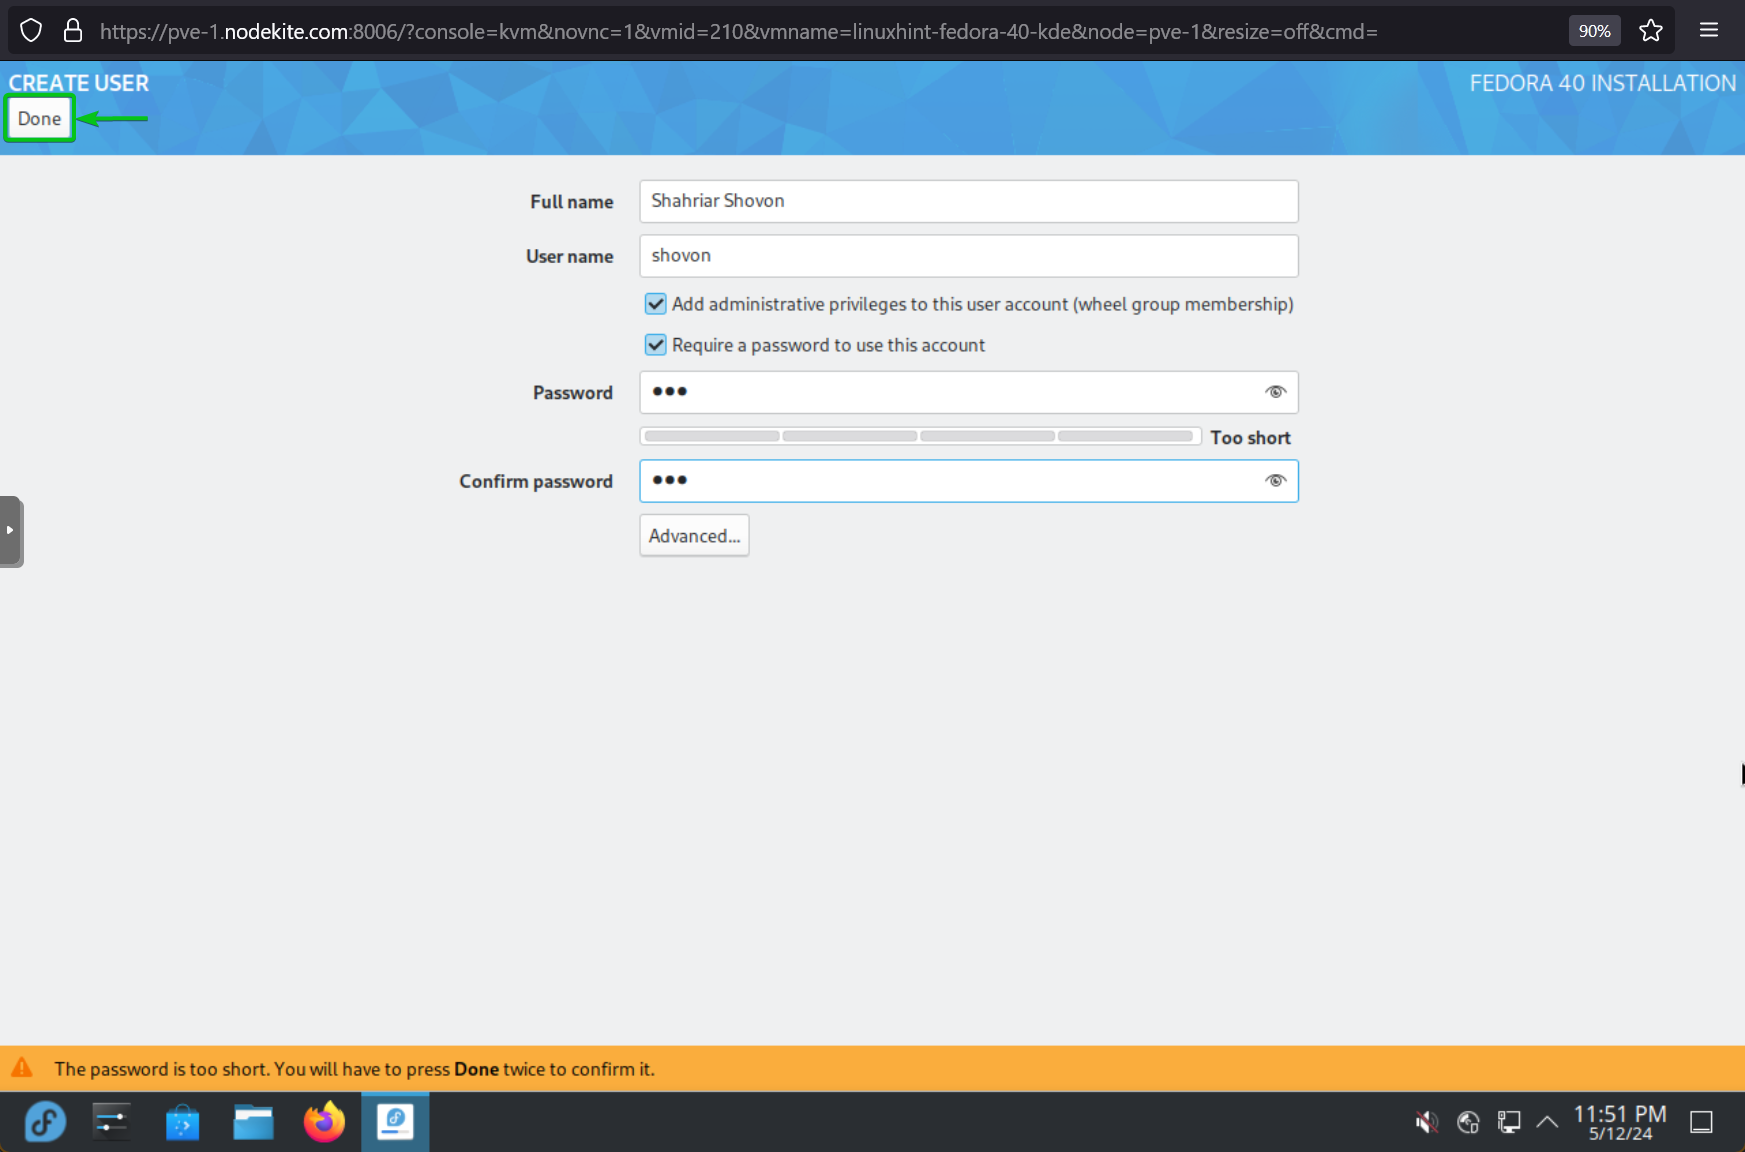
Type in the login user details and click on Done.
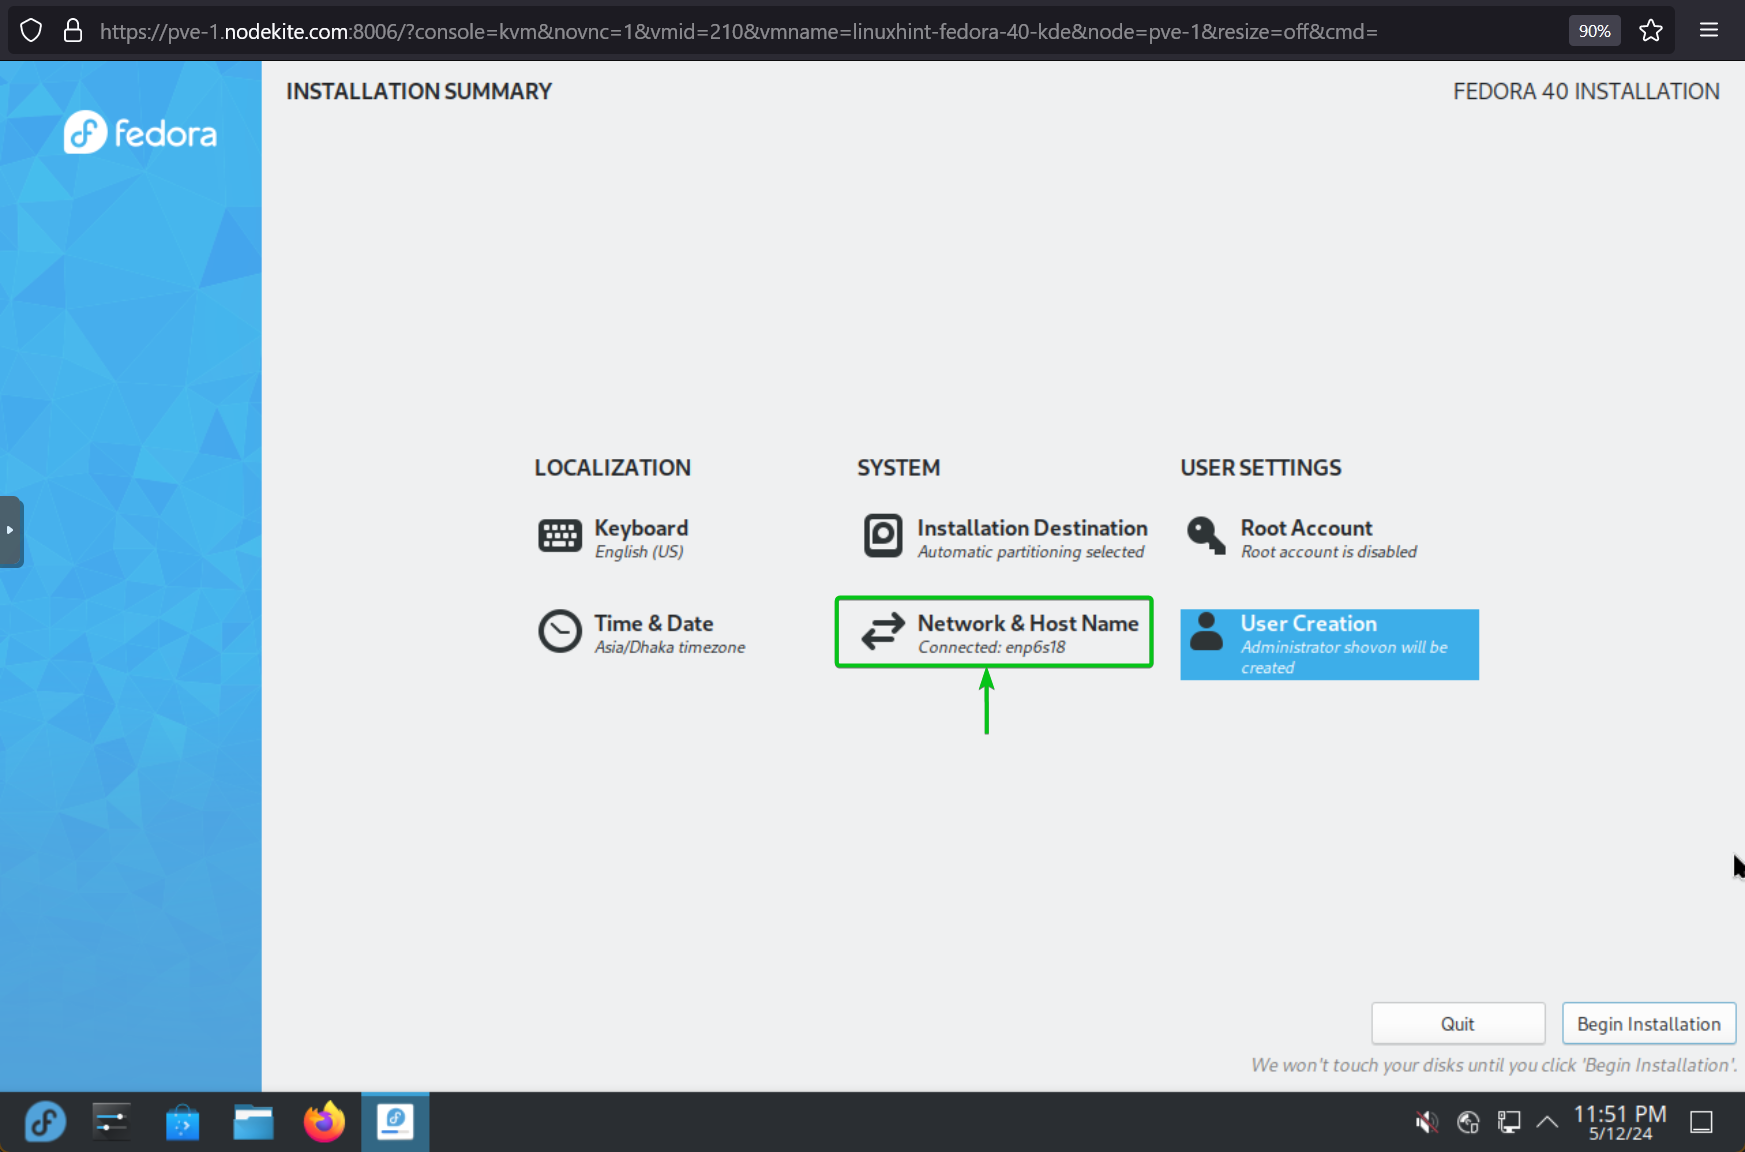
To set a hostname for the Fedora 40 installation, click on Network & Host Name.
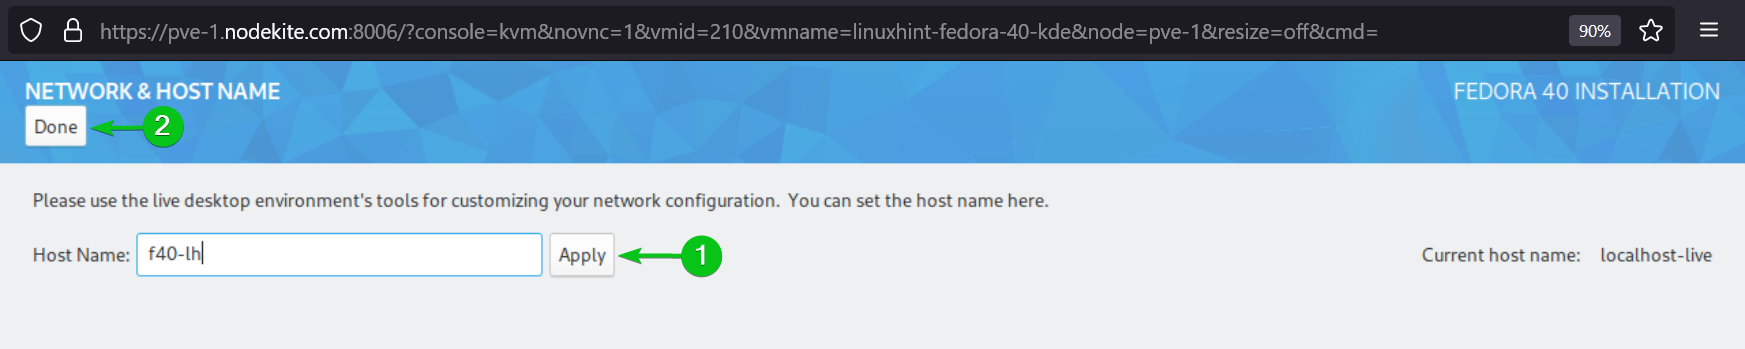
Type in your desired host name[1] and click on Done[2].
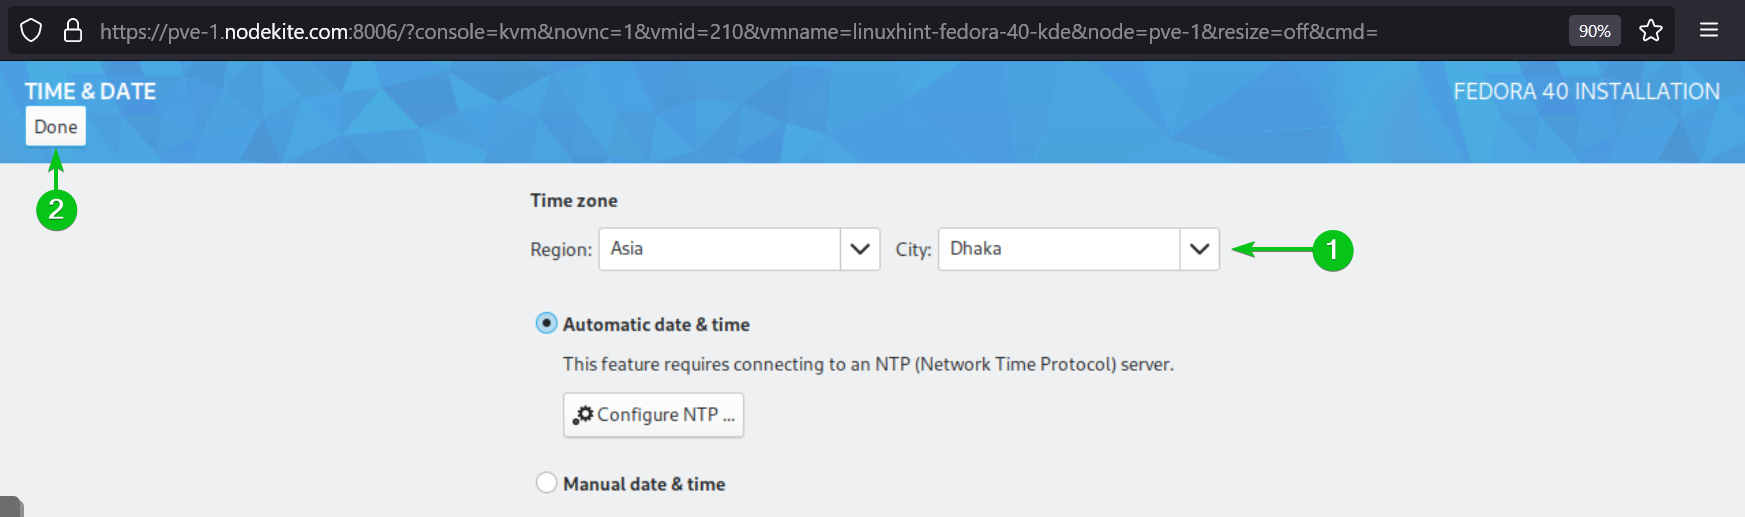
To set your time zone, click on Time & Date.
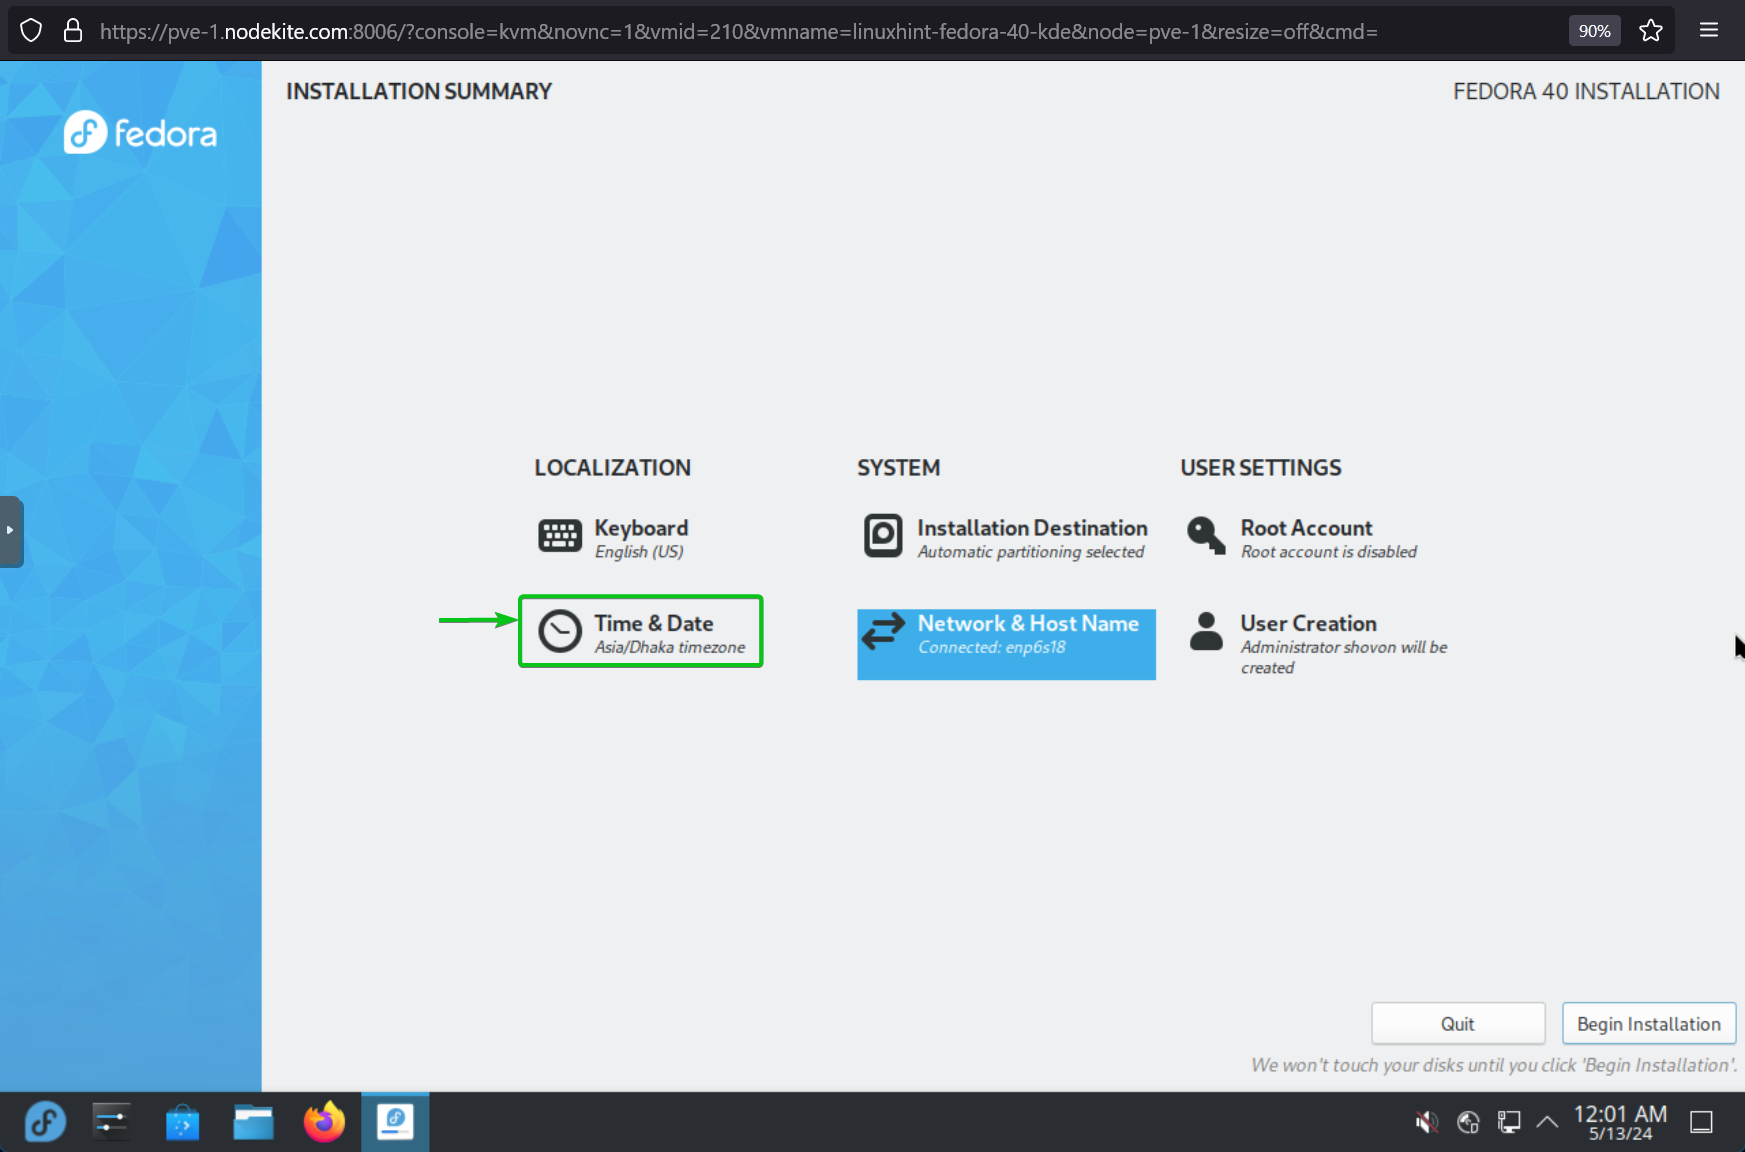
Select your Region and City from the respective dropdown menus[1] and click on Done[2].
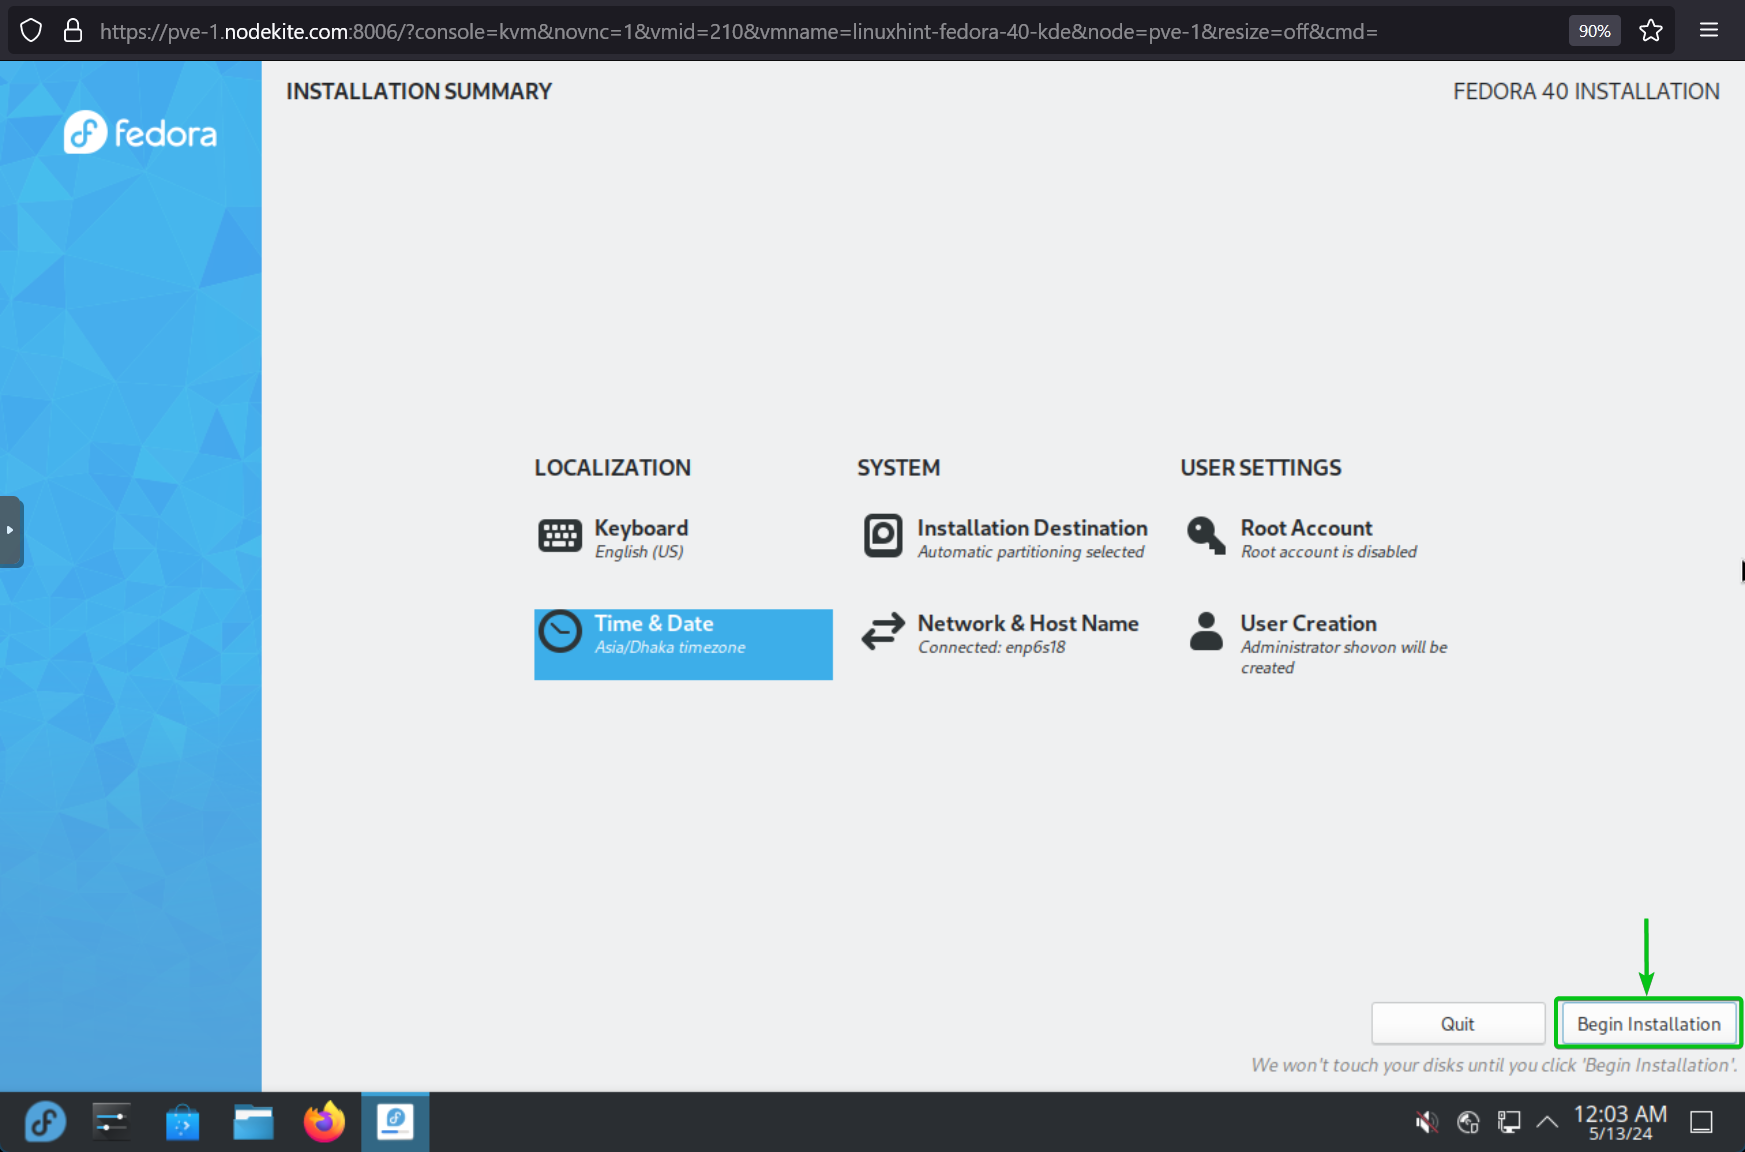
Once you’re done configuring the Fedora installation, click on Begin Installation.
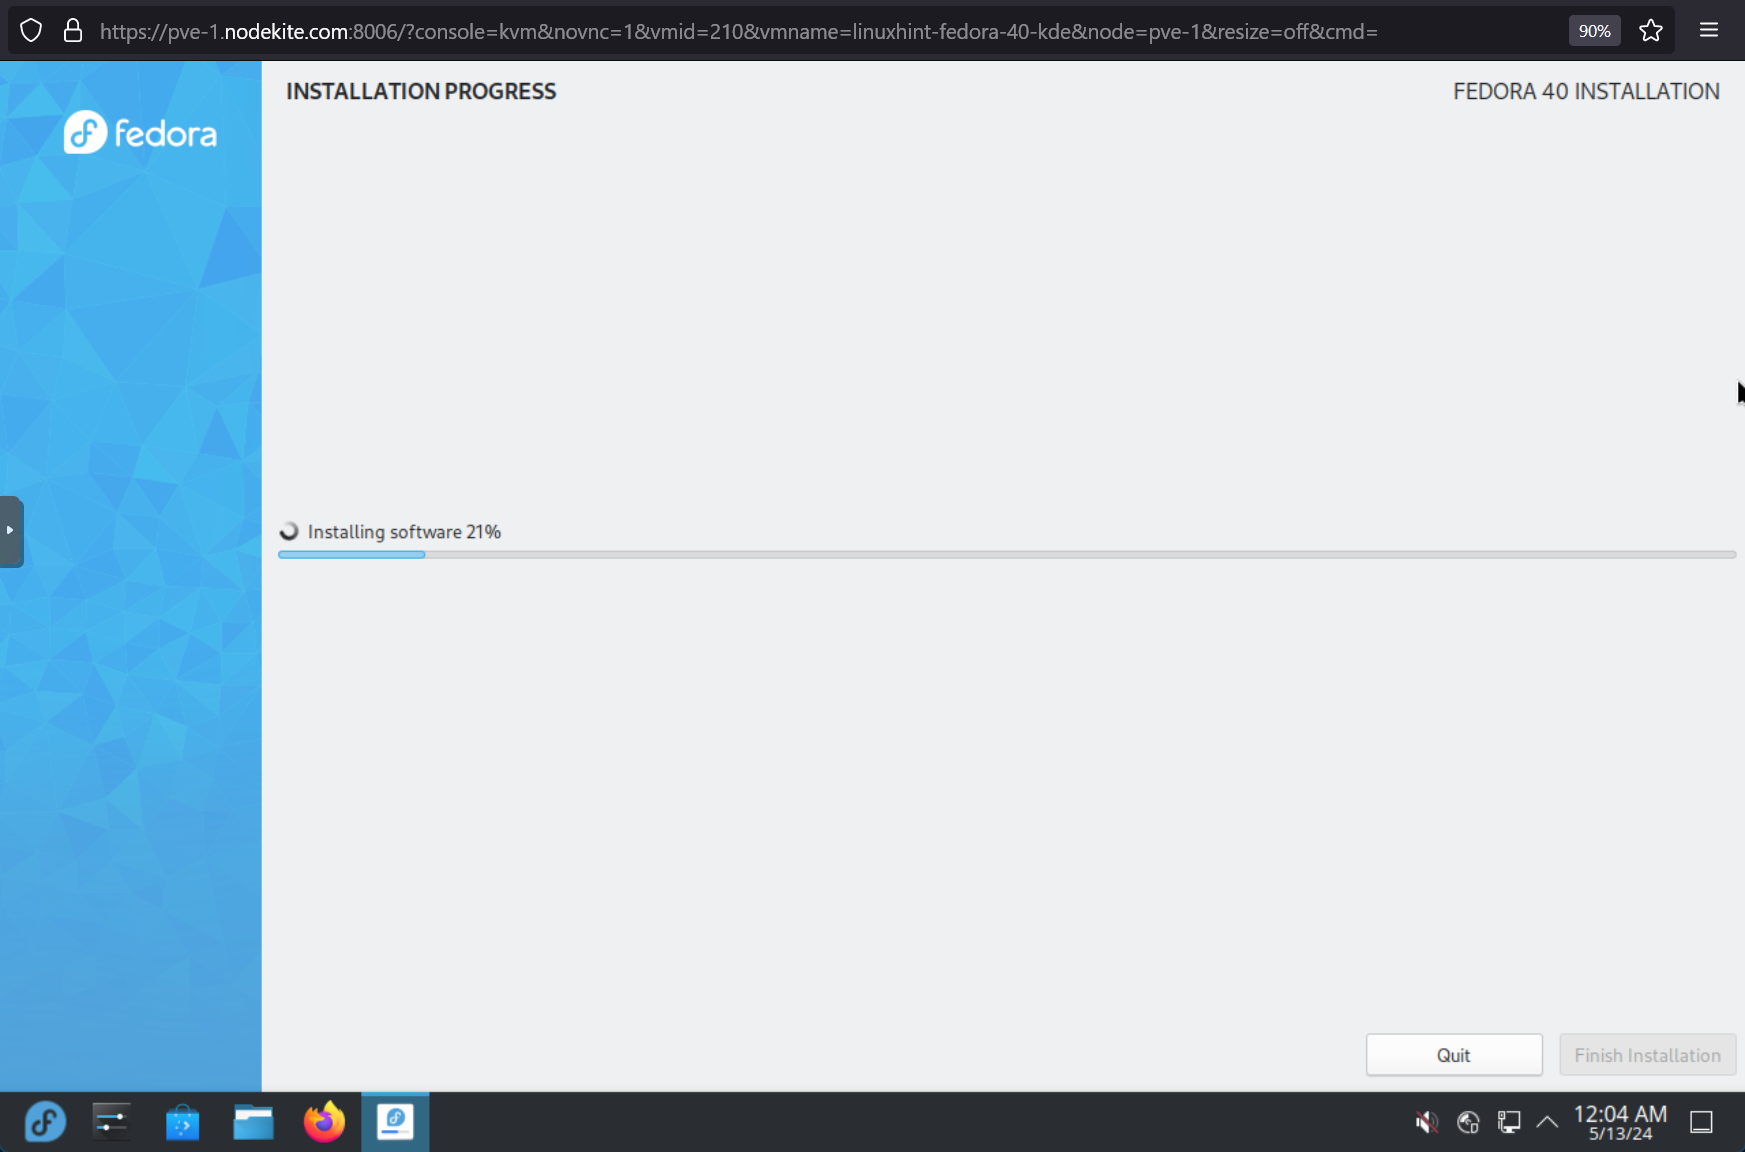
Fedora 40 is being installed on the disk of the Proxmox VE virtual machine. It will take a while to complete.
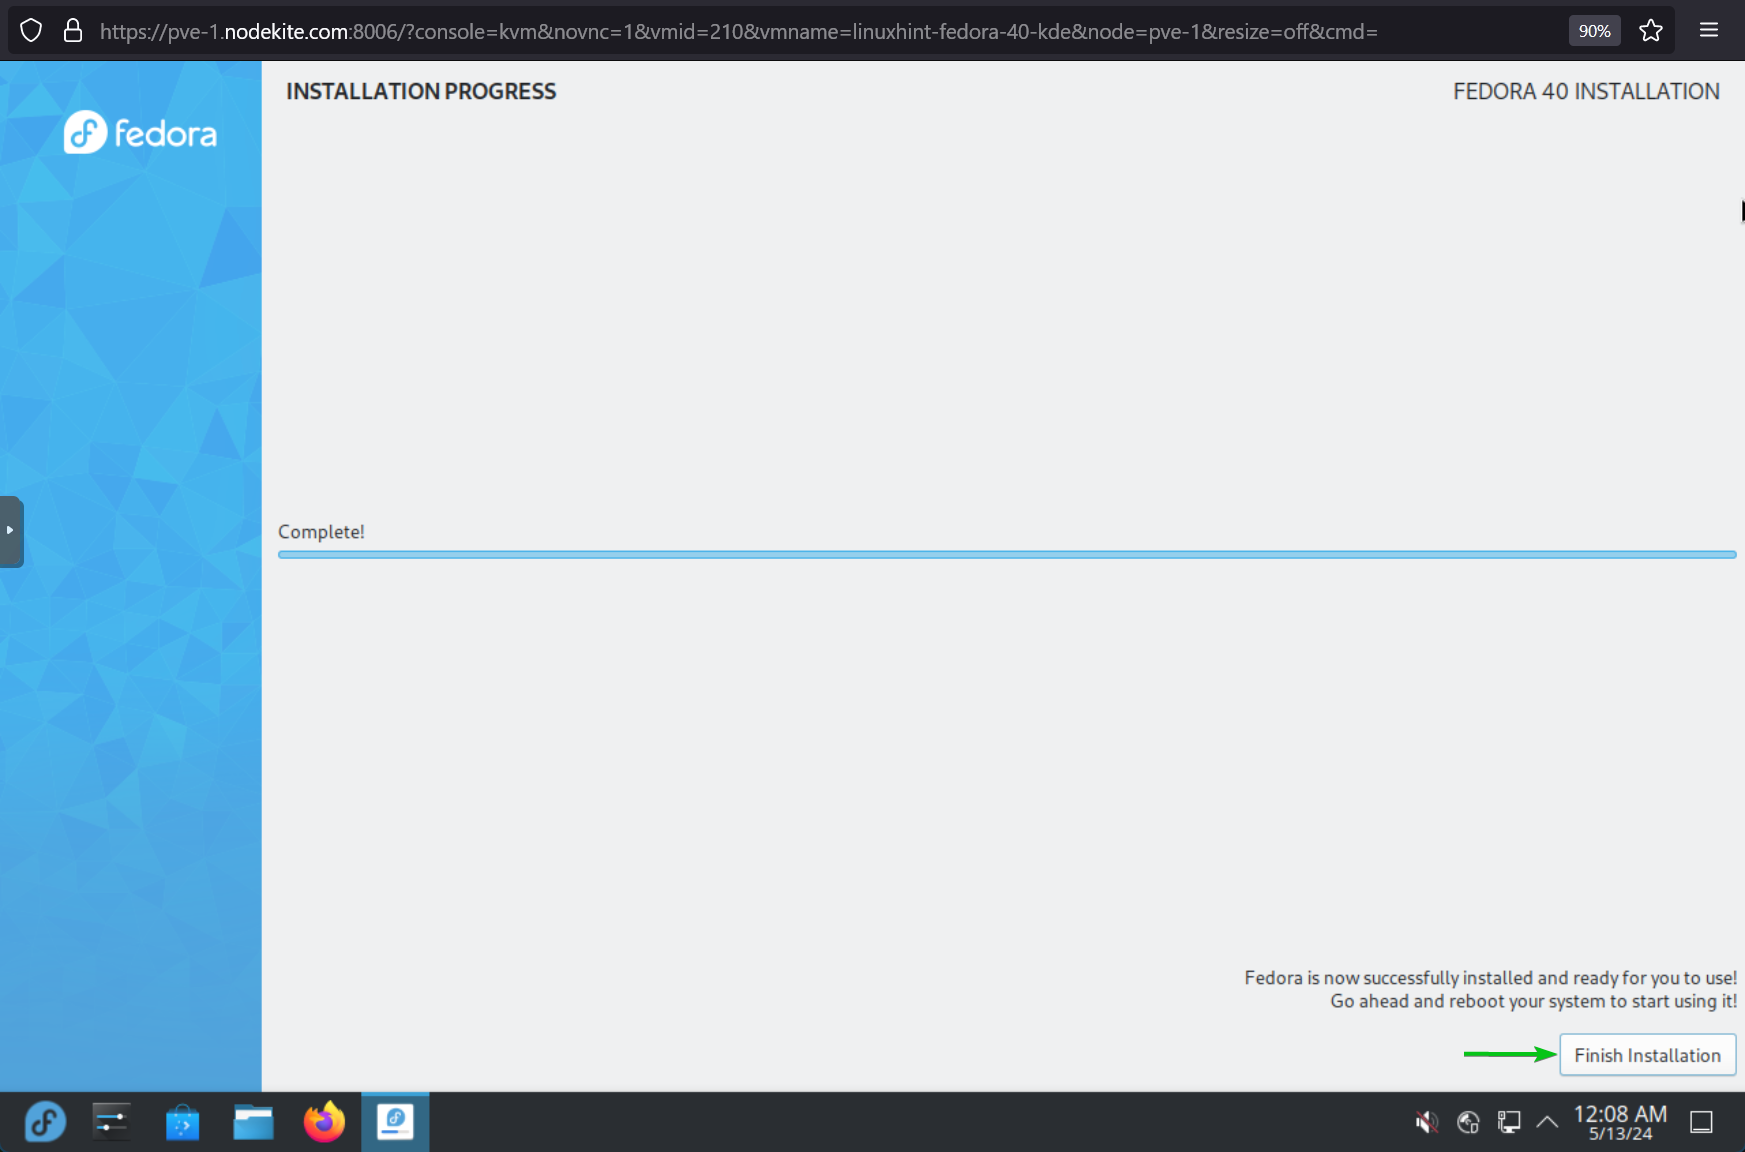
At this point, Fedora 40 should be installed.
Click on Finish Installation to close the Fedora 40 Installation window.
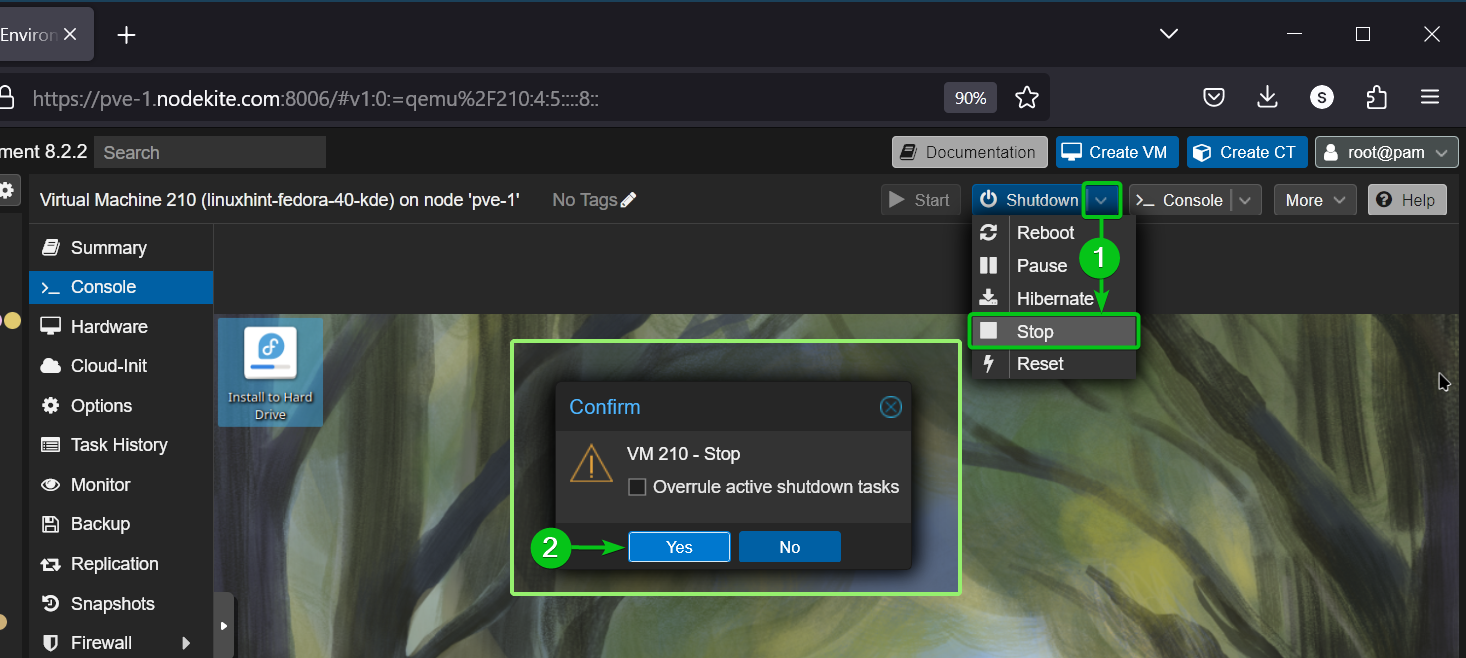
Once Fedora 40 is installed on the virtual machine, stop the virtual machine.
To stop the virtual machine, click on down arrow on the right-side of the Shutdown button and click on Stop[1].
To confirm the operation, click on Yes[2].
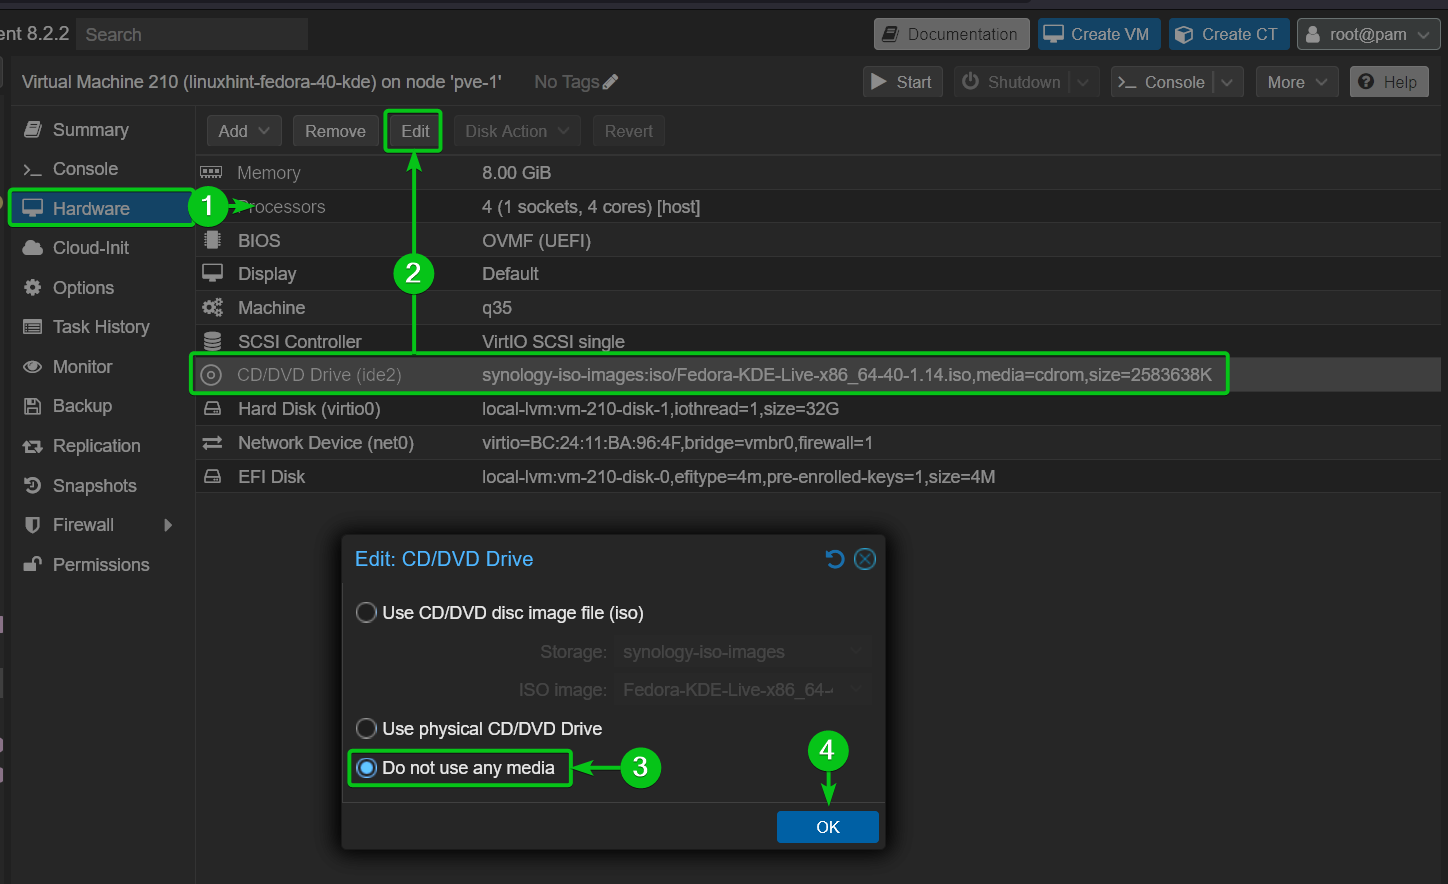
Once the virtual machine is stopped, you can remove the Fedora 40 ISO installation image from the virtual machine.
To remove the Fedora 40 ISO installation image from the virtual machine, navigate to the Hardware section of the virtual machine[1], select the CD/DVD Drive and click on Edit[2], select Do not use any media[3], and click on OK[4].
Once Fedora 40 is installed on the Proxmox VE virtual machine, you can start the virtual machine and use Fedora 40 on the virtual machine.
To start the virtual machine, click on Start.

You should see the Fedora 40 login window.
Log in to your Fedora 40 system with the username and password that you’ve set during the installation.
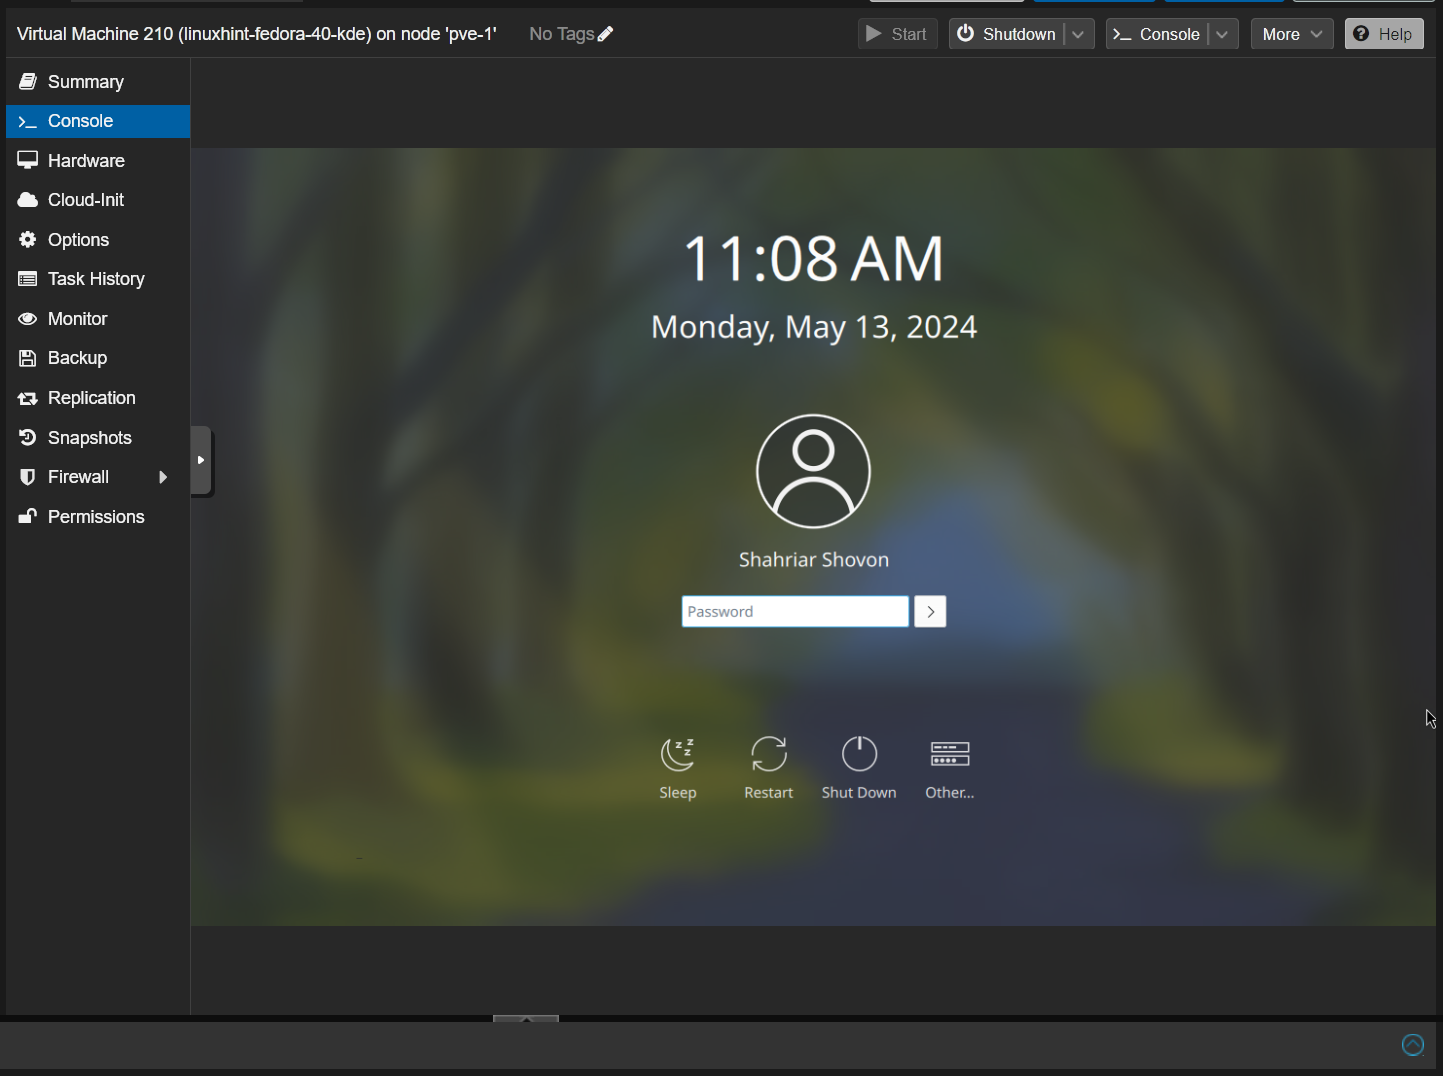
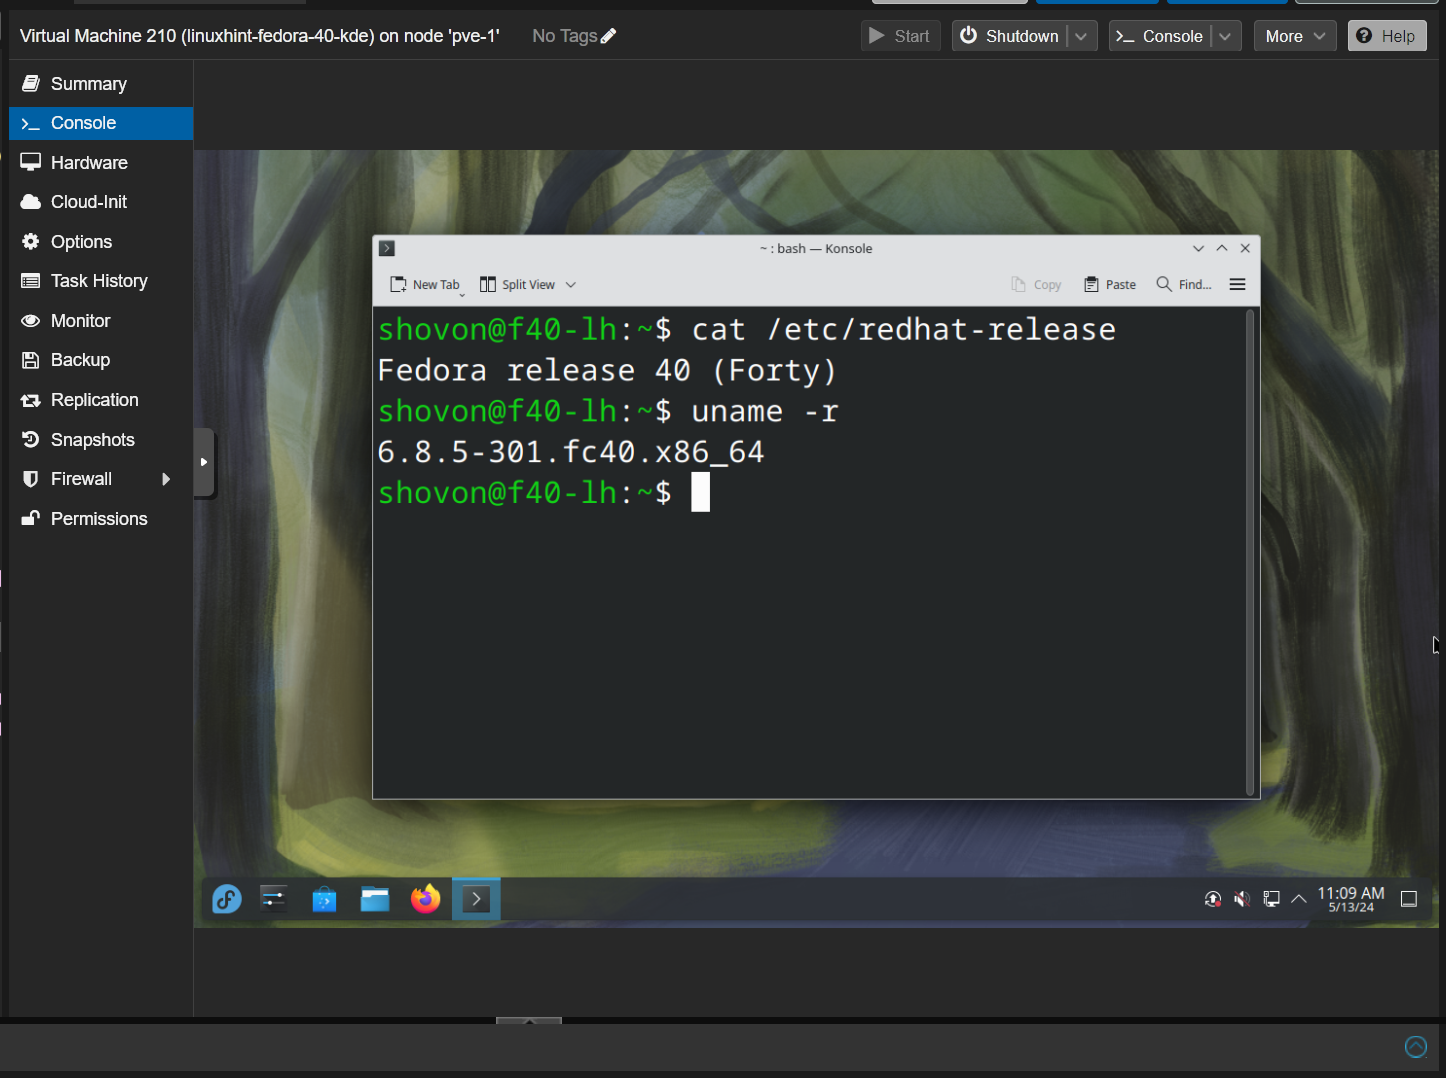
Once you’re logged in, your Fedora 40 virtual machine should be ready to use.
Once you’ve installed Fedora 40 on the Proxmox VE virtual machine, make sure to install the QEMU Guest Agent on the Fedora 40 virtual machine to enable Proxmox VE integration.
Once you’ve created a Fedora 40 virtual machine on Proxmox VE, you can passthrough an NVIDIA GPU to the virtual machine and use the virtual machine like a real computer (get near-native GPU performance and video output directly on the monitor connected to the GPU).
This article demonstrated the step-by-step process of creating a Fedora 40 virtual machine on Proxmox VE.
Источник: linuxhint.com
Наш сайт является информационным посредником. Сообщить о нарушении авторских прав.
Fedora Proxmox